Intro to Kisekae
A beginner's guide to SPNatI's character art creation program
Kisekae (or KKL) is the program used by every developer to create their characters' images in SPNatI. While some developers augment their sprites with external editors such as Photoshop or Paint.NET, they still use Kisekae as a base. And some of our best art was made entirely within Kisekae! It's a powerful tool, but one which requires practice to master.
A complete user guide to Kisekae is unfortunately too large an undertaking to attempt. The best method to learning the ins-and-outs of the program is to mess around with it yourself. This guide will instead lay out only the basics, in order to send you down the right path. Only the technical aspects of Kisekae will be covered here, not the artistic— this is how to do things, not what to do.
Note: This guide uses screenshots from KKL version 108.1, the most up-to-date version at the time of writing the guide. Later versions may look slightly different, and earlier versions may not have certain features.
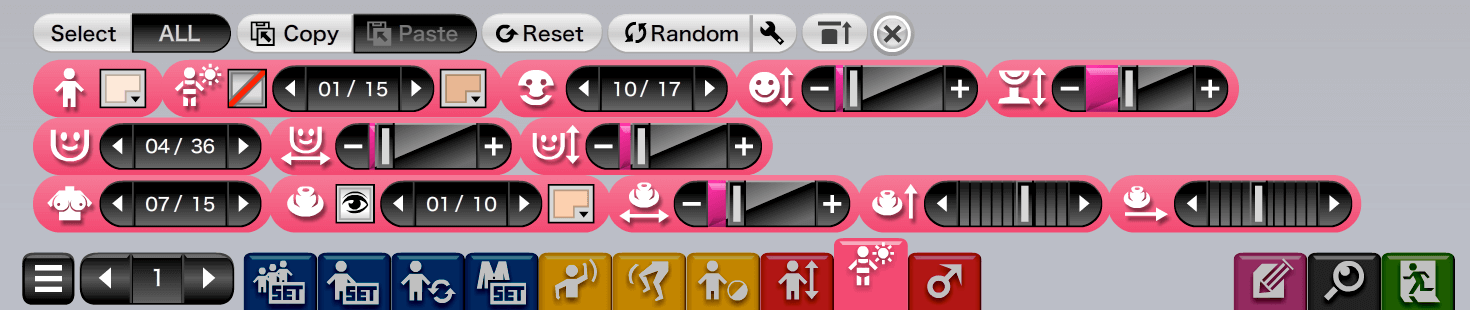
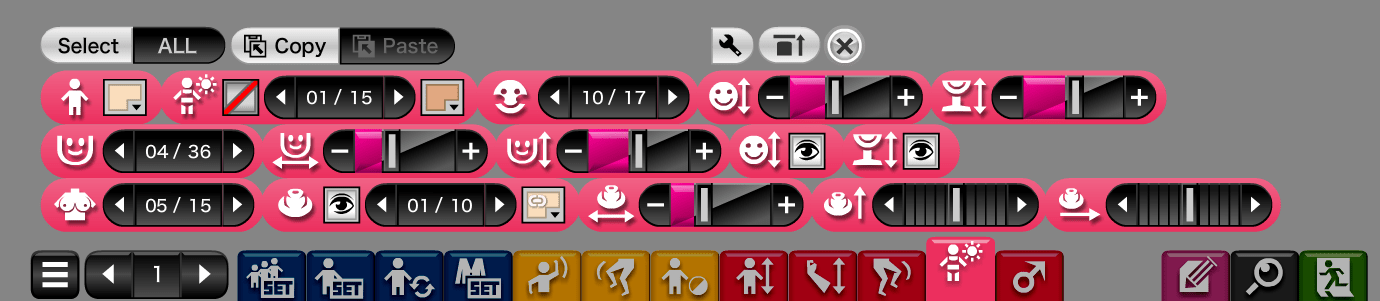
Tabs and Controls
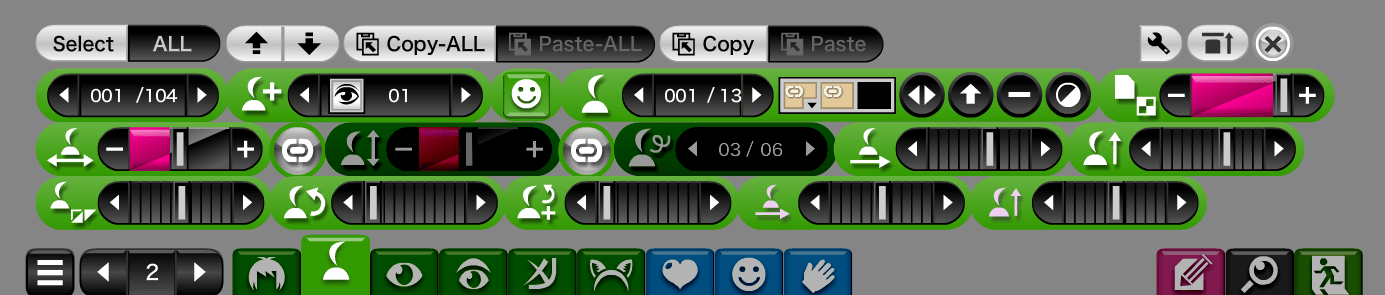
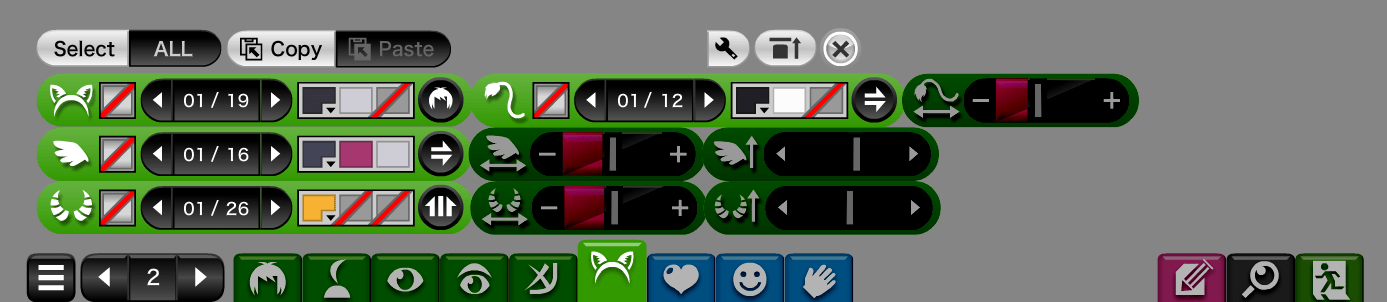
Going from Row One to Row Four, from left to right.
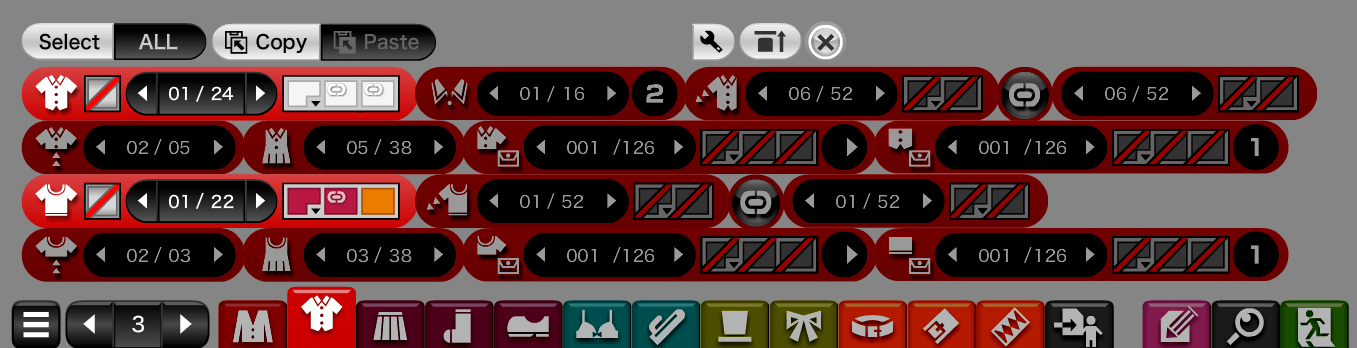
Sets
Default Sets

Choose from a set of default K-On! or Love Live! girls. These aren't particularly useful for our purposes.
Preset Characters

The default girls as individual characters. Not useful for SPNatI. Our versions of Maki and Shimakaze still needed adjustments beyond the defaults.
Preset Outfits
A variety of available outfits for default characters. For SPNatI it's better to more deliberate with costume choices, so this too is a tab you likely won't ever use.
Preset Attributes

| - | - | - | - | - |
|---|---|---|---|---|
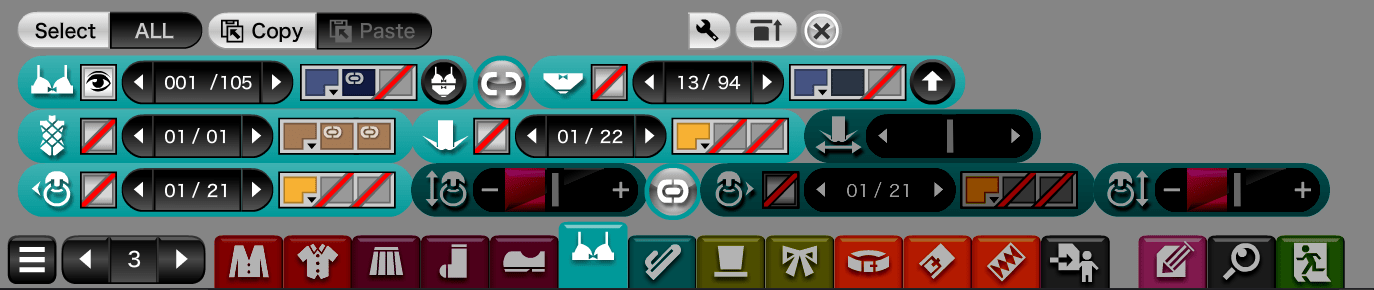
| Character Slot Selector | Pose Sets | Skin Color Sets | Height Adjuster | Preset Hairstyles (and hair color picker) |
| Preset Facial Features (and eye color picker) | Preset Outfits | Preset Underwear | Preset BGs |
Most of this isn't worth using, but you'll need to use the Character Slot Selector pretty often to hide, show, and select different characters. The button with the eye toggles a character slot on or off. When off, the eye will turn into a red slash. This on/off toggle will be available for almost every other item we encounter in this guide.
A new artist could get posing ideas from the Pose Sets selector as well, since those show off techniques like body and head rotation.
Above this menu are toggle for selecting one, multiple, or all characters, to put all characters on screen in a line centered in the middle of the screen, and to copy and paste an entire character between different slots. These buttons have slightly different functions for every tab. Inside the wrench button are toggles for the now-removed Random button. Next to it is a button that toggles if the tabs and menu will be pinned to the bottom or top of the screen. Click the 'X' to close the menu.
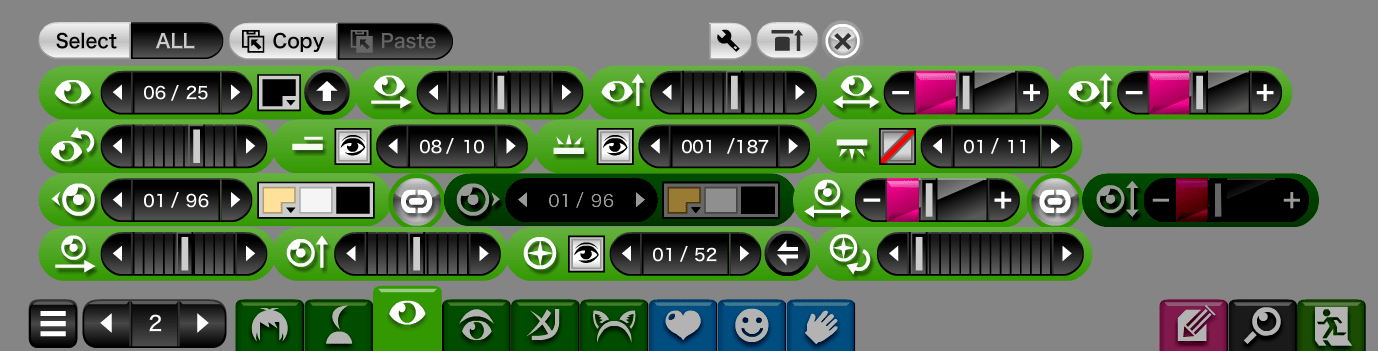
Posing
Arm Movement
| - | - | - | - | - |
|---|---|---|---|---|
| Right Shoulder Movement | Right Elbow Movement (with Layer Button) | Right Hand Selector | Right Wrist Movement | Invert Right Elbow Movement Toggle |
| Left Shoulder Movement | Left Elbow Movement (with Layer Button) | Left Hand Selector | Left Wrist Movement | Invert Left Elbow Movement Toggle |
| Right Hand Held Item Selector (plus Color Picker) | Left Hand Held Item Selector |
This tab is used to pose the arms of your character when it comes time to make their sprites. Use the grey link toggle button on the right hand side of the first row of this tab to de-link the left and right arms when posing.
The Color Picker chooses color of held objects. Most objects in Kisekae allow you to pick a color. The Layer Button is the up arrow, in this case next to the Right Elbow Movement slider, which adjusts the arm behind or in front of the body. There are five levels in which the arm can appear on, which behave differently with how ribbons or hair peices can be anchored to the body. This is also a fairly common button, and different items layer over different things.
Using the Copy and Paste Buttons here, like in most tabs, will copy all attributes for you to paste onto a character.
Leg and Body Movement

| - | - | - | - | - | - |
|---|---|---|---|---|---|
| Right Leg Position Selector (with Flip Button and link toggle) | Left Leg Position Selector | Head Rotation | Body Rotation | ||
| Swaps Characters in Slots | Horizontal Movement | Depth | Vertical Movement (with shadow) | Vertical Movement (shadow adjusts for height) | Shadow Visibility Toggle |
This is where you do the bulk of your posing. For the CE, it's usually best to keep your character at 500 on the Depth (forward and back movement) slider. For some sitting poses, you may need to adjust them back. Sliders for the legs can be found in the Fine-Tune Leg Adjustments tab.
The Flip Button, the sideways facing arrow next to the Right Leg Position Selector, swaps right and left leg positions, while the link toggle button unlinks left and right legs. Both these buttons are common in other tabs as well.
Blurs, Shadows, and Silhouettes
| - | - | - | - | - | - |
|---|---|---|---|---|---|
| Overlay Selector | Overlay Opacity | Character Opacity | |||
| Drop Shadow (with Color Picker) | Invert Drop Shadow | Shadow Mask | Shadow Only | Shadow Opacity | Shadow Size |
| Shadow Blur Horizontal | Shadow Blur Vertical | Shadow Direction | Shadow Distance | ||
| Blur Toggle and Type Selector | Blur Level Horizontal | Blur Level Vertical | Emote Bubble Blur |
This is an advanced tab not often used in posing. It adds effects over your character sprite. Poses using partial transparency or a blur effect likely use this tool.
Proportions
Width and Height
| - | - | - | - | - | - |
|---|---|---|---|---|---|
| Character Size | Body Height | Leg Length | |||
| Lower Leg and Foot Thickness | Arm Thickness | Chest Width | Shoulder Width | Chest Visibility Toggle | Hip and Thigh Width |
| Belly Button Selector | Waist Selector | Body Detail Opacity | Torso Visibility Toggle | Torso Height |
One of the most important tabs in Kisekae. Because the proportions for the default characters are awful, you'll want to adjust them when making your own models. The Character Size slider adjusts the overall model size, while the Body Height slider adjusts everything besides the head. It is recommended to unlink the Body Height and Leg Length sliders for finer control.
Hip width and thigh width scale with each other. However, the thigh and general leg length and thickness can be further adjusted in the Fine-Tune Leg Adjustments tab.
Fine-Tune Arm Adjustments
| - | - | - | - | - | - | - |
|---|---|---|---|---|---|---|
| Left Upper Arm Thickness | Left Upper Arm Horizontal Position | Left Upper Arm Length | Left Upper Arm Vertical Position | Left Shoulder Visibility Toggle | Left Upper Arm Visibility Toggle (with link toggle) | |
| Right Upper Arm Thickness | Right Upper Arm Horizontal Position | Right Upper Arm Length | Right Upper Arm Vertical Position | Right Shoulder Visibility Toggle | Right Upper Arm Visibility Toggle | |
| Left Lower Arm Thickness | Left Lower Arm Horizontal Position | Left Lower Arm Length | Left Lower Arm Vertical Position | Left Lower Arm Visibility Toggle | Flip Left Lower Arm Toggle (with link toggle) | |
| Right Lower Arm Thickness | Right Lower Arm Horizontal Position | Right Lower Arm Length | Right Lower Arm Vertical Position | Right Lower Arm Visibility Toggle | Flip Right Lower Arm Toggle | |
| Left Hand Thickness | Left Hand Horizontal Position | Left Hand Length | Left Hand Vertical Position | Left Hand Visibility Toggle | Flip Left Hand Toggle (with link toggle) | |
| Right Hand Thickness | Right Hand Horizontal Position | Right Hand Length | Right Hand Vertical Position | Right Hand Visibility Toggle | Flip Right Hand Toggle |
This tab is important for both proportions and posing. It allows the upper arms, lower arms, and hands to be resized separately of the aforementioned Arm Thickness slider, and positioned independently of the Arm Movement tab. If these values are edited, the lower arms and/or wrists may appear to disconnect from the rest of the arms when they are rotated.
Note
The first iteration of this tab was added in KKL 105.5a10. A code created before this release does not have the data for this tab in it and thus pasting it over a code from a later version will give the older code the data of the newer code's arm adjustments.
Fine-Tune Leg Adjustments

| - | - | - | - | - | - | - | - |
|---|---|---|---|---|---|---|---|
| Left Thigh Rotation | Left Thigh Thickness | Left Thigh Horizontal Position | Left Thigh Length | Left Thigh Vertical Position | Left Thigh Visibility Toggle | Left ‘Butt Fang’ Visibility Toggle | |
| Right Thigh Rotation | Right Thigh Thickness | Right Thigh Horizontal Position | Right Thigh Length | Right Thigh Vertical Position | Right Thigh Visibility Toggle | Right ‘Butt Fang’ Visibility Toggle | |
| Left Calf Rotation | Left Calf Thickness | Left Calf Horizontal Position | Left Calf Length | Left Calf Vertical Position | Left Calf Visibility Toggle | Calf Link Toggle | Thigh Link Toggle |
| Right Calf Rotation | Right Calf Thickness | Right Calf Horizontal Position | Right Calf Length | Right Calf Vertical Position | Right Calf Visibility Toggle | ||
| Left Foot Rotation | Left Foot Thickness | Left Foot Horizontal Position | Left Foot Length | Left Foot Vertical Position | Left Foot Visibility Toggle | Foot Link Toggle | |
| Right Foot Rotation | Right Foot Thickness | Right Foot Horizontal Position | Right Foot Length | Right Foot Vertical Position | Right Foot Visibility Toggle |
Another tab important for both proportions and posing, it functions similarly to its arms counterpart. It allows the thighs, calves, and feet to be resized separately of the aforementioned Lower Leg and Foot Thickness slider, and positioned independently of the Leg Movement tab. If these values are edited, there may be gaps between the thighs and hips, or the calves and the feet, especially when using the Leg Movement tab.
Note
The first iteration of this tab was added in KKL 106a10. A code created before this release does not have the data for this tab in it and thus pasting it over a code from a later version will give the older code the data of the newer code's leg adjustments.
Skin Color and Head Proportions
| - | - | - | - | - |
|---|---|---|---|---|
| Skin Color | Tanlines (plus toggle and Color Picker) | Blush Stickers | Head Size | Neck Length |
| Chin + Cheeks Shape | Chin + Cheeks Width | Chin + Cheeks Length | Head Visibility Toggle | Neck Visibility Toggle |
| Breast Size | Nipple Selector (plus toggle and Color Picker) | Nipple Size | Nipple Horizontal Position | Nipple Vertical Position |
Set the Blush Sticker selector to 10 for no default blush (the recommended choice). For Breast Size, use size 1 or 2 for a male character. Tanlines aren't necessary if your character wouldn't have them.
I apologize on behalf of Pochi for the available chin shapes.
The Saucy Bits
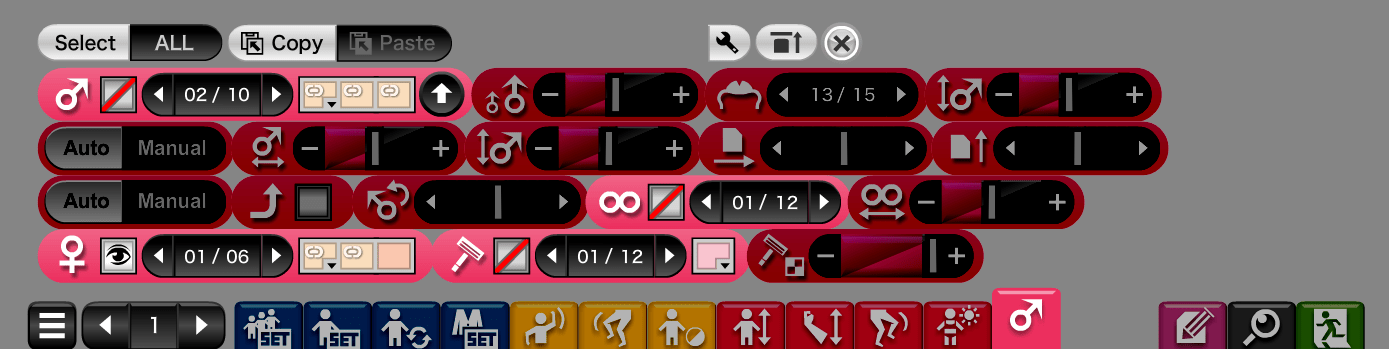
| - | - | - | - | - |
|---|---|---|---|---|
| Penis Selector (plus toggle and Color Picker, use the up arrow to adjust layering) | Erection Size Increase | Penis Head Selector | Penis Size | |
| Manual Penis Adjustment Controls | Penis Thickness | Penis Length | Penis Horizontal Position | Penis Vertical Position |
| Erection Controls | Erection Toggle | Penis Rotation | Testicles | Testicle Size |
| Vagina Selector (plus toggle and Color Picker) | Pubic Hair (plus toggle and Color Picker) | Pubic Hair Opacity |
If you give your model a penis, be sure to set the Erection Controls to Manual. Use the Erection Toggle to give your model an erection. The Erection Size Increase slider affects the size of the erection relative to the size of the penis, so no change will be visible if the model is flaccid.
The Manual Penis Adjustment Controls allows for adjusting the size and placement of the flaccid penis outside of the Penis Size slider and Penis Selector.
With the model selected, click and hold on the labia to spread them. Click and hold again to close. Clicking repeatedly on the vagina will create Love Juice, hold down Spacebar and click on the juice to remove it.
Make sure to turn off the vagina if making a male character.
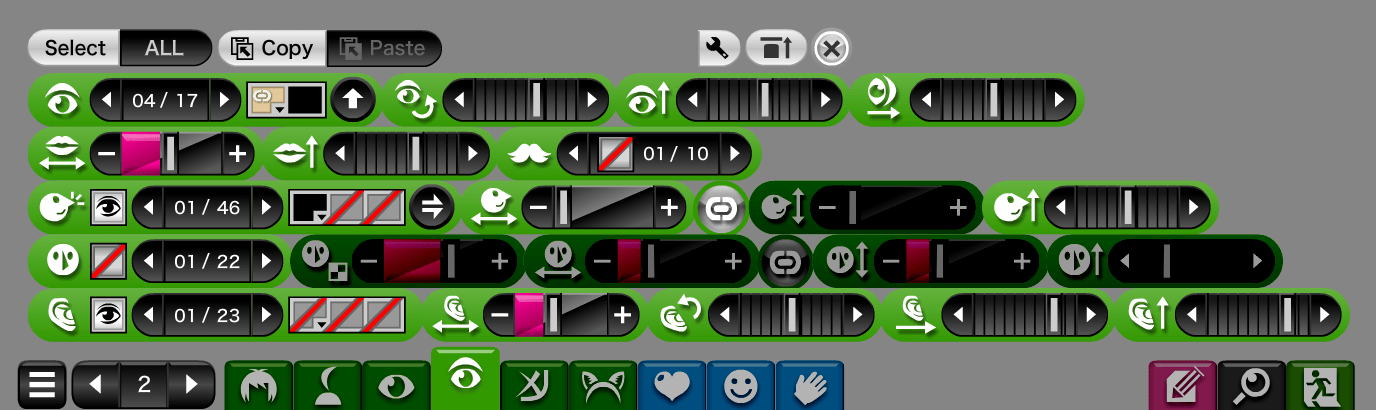
Features
Hair
| - | - | - | - |
|---|---|---|---|
| Hair Color (All) | Base Hair (with Flip Button) | Bangs (with Flip Button and Layer Button) | Bang Length |
| Back Hair (with gravity toggle) | Back Hair Length | Back Hair Width | Back Hair Position |
| Right Side Lock (plus Layer Button and Gravity Toggle) | Right Side Lock Length | Right Side Lock Position | (button to toggle link with Left Side Lock) |
| Left Side Lock (plus Layer Button and Gravity Toggle) | Left Side Lock Length | Left Side Lock Position |
Changing the Hair Color (All) selector will adjust the color for all hair and hairpieces, so be careful. You can make gradient hair by selecting two different colors with the first two spots in the Color Picker. The third slot is for the outline color.
The rightmost button on the Back Hair and Side Locks selectors is the Gravity Toggle. This either looks like a circular arrow or a dash, depending on whether it is active or inactive respectively. When active, it makes the affected hair obey gravity when the model's head is tilted (though not when the entire body is).
The Layer Button, the button with the up arrows, adjusts the layering of the Bangs to be above or below the sides of the Base Hair. For the Side Locks, this is either behind the back, behind the ear, or in front of the ear. If you've been following this guide in order, you're already familiar with this button (penises also have it).
Hair Pieces
| - | - | - | - | - |
|---|---|---|---|---|
| Hair Piece Sets | Hair Piece Slots | Hair Piece Anchoring Location | Hair Piece Selector (plus Color Picker, Mirroring Button, Layer Button, Gravity Toggle, and Shading Toggle) | Hair Piece Opacity |
| Hair Piece Width (with height Link Toggle) | Hair Piece Height (with outline Link Toggle) | Hair Piece Outline Thickness | Hair Piece Horizontal Position | Hair Piece Vertical Position |
| Hair Piece Skew | Hair Piece Rotation | Hair Piece Skewed Rotation | Sub-Pixel Hair Piece Horizontal Position | Sub-Pixel Hair Piece Vertical Position |
Use the Hair Piece Anchoring Location to pin hair pieces to the other parts of the body, and you can create body detailing, clothing, and complex hair styles. The options to pin hair pieces are: Head, Base Hair, Bangs, Back Hair, Chest, Torso, Thighs, Calves, Feet, Upper Arms, Lower Arms, Hands, and Whole Body. Hair pieces attached to a part of the hair with Gravity toggled on will move with the hair.
For the four buttons on the Hair Piece Selector: the Mirroring Button, which looks like two triangles pointed in opposite directions, allows you to choose the right-hand version of a hairpiece, the left-hand version, or both. The Layer Button and Gravity Toggle were explained in previous sections. Finally the Shading Toggle allows you to turn off the shadows on any hairpieces which have them.
The slider for Skewed Rotation affects a hairpiece after it has been skewed based on how much it has been skewed. A Hairpiece at the default skew of 500 won't see any difference compared to the normal Rotation slider.
The sliders for Sub-Pixel Horizontal and Vertical Placement are sort of advanced tools. They move the pieces at a tenth of a pixel compared to their whole-pixel counterparts and are most useful for small, fine details.
Holding down shift when using the controls will adjust all hair pieces at once. Holding down ctrl when using the controls will adjust all hair pieces anchored to the point of the hair pieces you currently are on. This is the same for Face Marks, Ribbons, and Belts.
The Copy and Paste Buttons at the top work differently here; Copy will copy only the slot you are on, while Copy-ALL copies every slot, active or not.
Warning
Pressing the Hair Piece Sets button (AKA the Set button) will replace all your hairpieces with a pre-set group of hairpieces. Be very careful around this tab as to not undo your hard work. Thankfully, KKL keeps backups in case of this button being accidentally pressed.
Eyes
| - | - | - | - | - |
|---|---|---|---|---|
| Eye Shape (plus outline Color Picker and Layer Button) | Eye Horizontal Position | Eye Vertical Position | Eye Width | Eye Height |
| Eye Rotation | Eyelids | Eyelashes | Under-Eye Lines | |
| Right Iris and Pupil Style (with link toggle) | Left Iris and Pupil Style | Iris Width | Iris Height | |
| Iris Horizontal Position | Iris Vertical Position | Eye Shine (with Flip Button) | Eye Shine Rotation |
The Layer Button next to the Eye Shape selector layers eyes above or below the bangs. The Eyelids selector are just lines above the eye, but below the eyebrow.
The Flip Button on the Eye Shine selector (the one that looks like an arrow pointed either left or right) flips it horizontally. This is the same button on the hair and bangs selectors above.
When adjusting a characters eyes during posing, we recommend to not use the Iris Position sliders for that. Instead, use the tools in the Facial Posing Tab (covered later in this guide).
Facial Features
| - | - | - | - | - |
|---|---|---|---|---|
| Eyebrows (with Color Picker and Layer Button) | Eyebrow Rotation | Eyebrow Vertical Position | Eyebrow Horizontal Position | |
| Mouth Size | Mouth Height | Facial Markings (can be toggled individually) | ||
| Nose | Nose Width (with link toggle) | Nose Height | Nose Vertical Position | |
| Nose Shadow | Nose Shadow Opacity | Nose Shadow Width (with link toggle) | Nose Shadow Height | Nose Shadow Vertical Position |
| Ears | Ear Width | Ear Rotation | Ear Horizontal Position | Ear Vertical Position |
Like with the eyes and irises before, it is better to adjust Eyebrows and Mouth Size using the Facial Posing Tab when it comes time for facial posing, not this tab. Instead, use these controls to get a good "neutral" benchmark to work off of.
Not all Ears allow you to pick colors. Those that don't will just be the model's skin color.
Face Marks
| - | - | - | - | - |
|---|---|---|---|---|
| Face Marks Slots | Face Mark Selector (plus Color Picker, Mirroring Button, and Layer Button) | Face Mark Opacity | ||
| Face Mark Width (with link toggle) | Face Mark Height | Face Mark Skew | Face Mark Rotation | Face Mark Outline Selector |
| Face Mark Horizontal Position | Face Mark Vertical Position | Sub-Pixel Face Mark Horizontal Position | Sub-Pixel Face Mark Vertical Position |
Face Marks, like hair pieces, have multiple anchor points they can anchor to, and can be layered above or below these parts. These can be used to create custom facial shading, custom eyes and eyebrows, and even makeup. The options to pin face marks are: Face, eyelid, iris, mouth, eye, sclera, and eyebrows.
Holding down shift when using the controls will adjust all face marks at once. Holding down ctrl when using the controls will adjust all face marks anchored to the point of the face mark you currently are on.
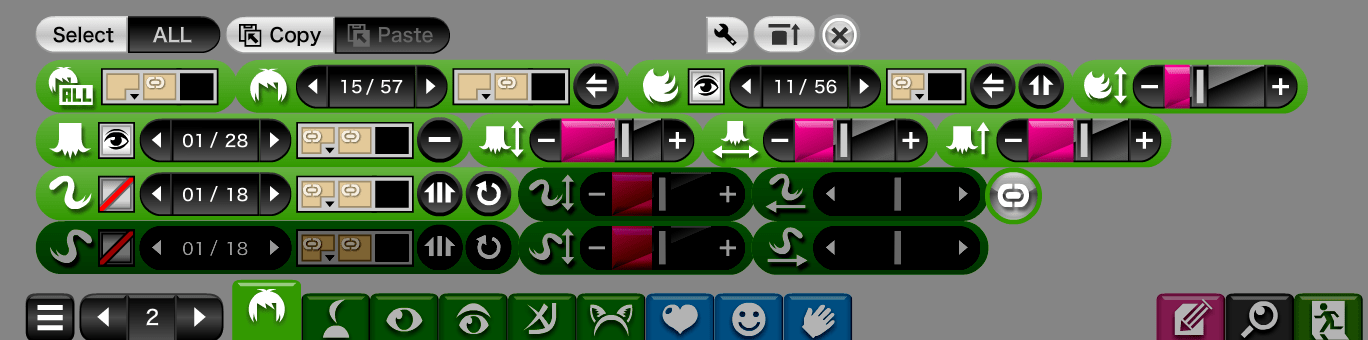
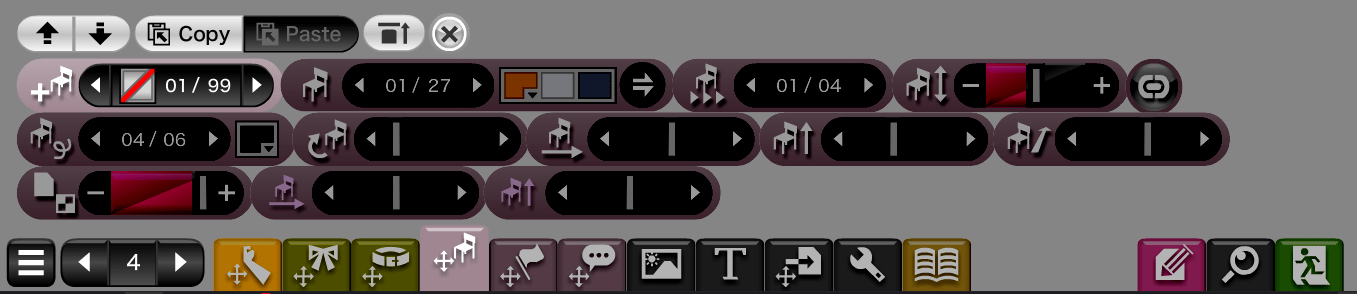
Ears, Horns, and Tails
| - | - | - |
|---|---|---|
| Animal Ears (with Color Picker and Clothing Toggle) | Tails (with Color Picker and Flip Button) | Tail Size |
| Wings (with Flip Button) | Wing Size | Wing Vertical Position |
| Horns (with Layer Button) | Horn Size | Horn Position |
The Clothing Toggle on the Animal Ears control is the button that looks like hair or a hat, depending on what it's set to. As hair, the ears are treated as part of the body, but as a hat they're treated as clothing, and can be clicked on to remove. That seems to be the only difference.
Click on a Wing to adjust its position. Horn Positions adjust the horn either vertically or around the head, depending on the horn.
Note: If you don't see the exact ear or tail you like, it's probably best to make your own with Ribbons or Hair Pieces, or to draw your own and import it as an Image Attachment rather than settle for one here that's not quite as good.
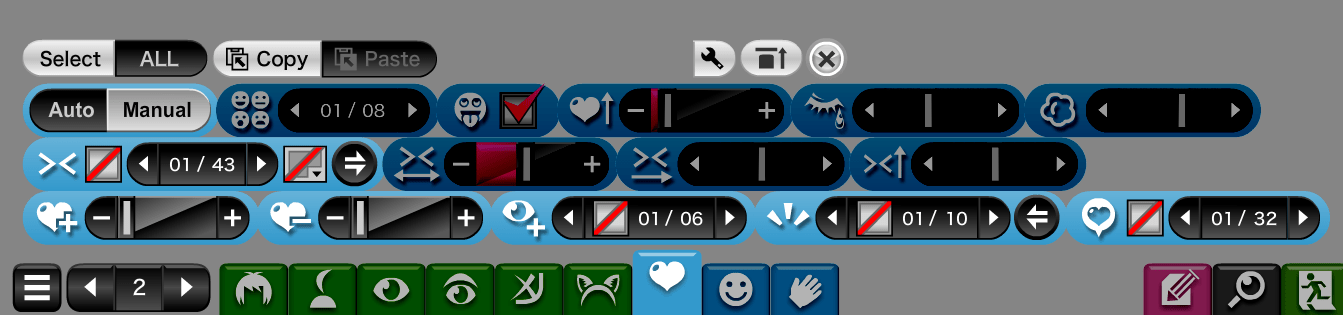
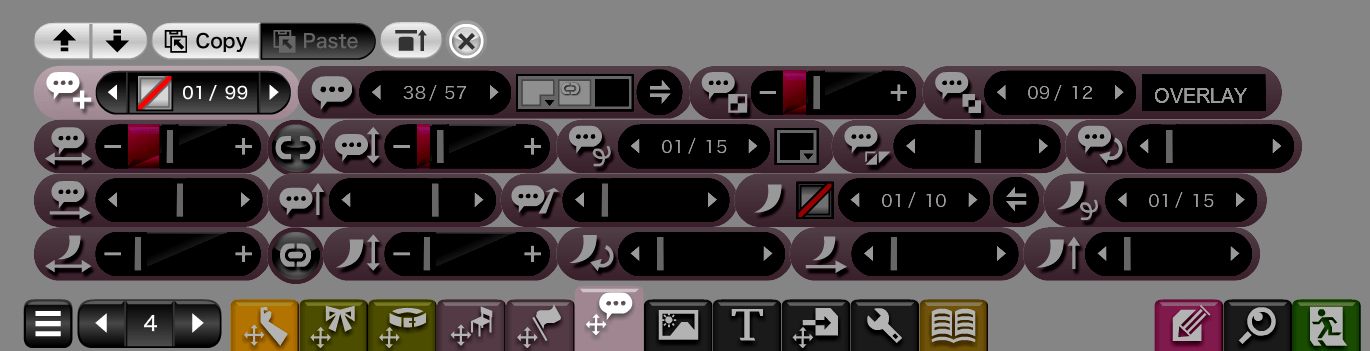
Expressions
Emotions & Emotes
| - | - | - | - | - | - |
|---|---|---|---|---|---|
| Auto vs. Manual Switch | Personality Type (Auto Only) | Ahegao Toggle (Auto Only) | Horniness Slider (Auto Only) | Crying Slider (Auto Only) | Heavy Breaths Slider (Auto Only) |
| Emote Eyes (with sclera Color Picker and Flip Button) | Emote Eye Size | Emote Eye Horizontal Position | Emote Eye Vertical Position | ||
| Blush | Unblush | Eye effects (can be toggled individually) | Emotion Effects (with Flip Button, can be toggled individually) | Emote Bubble |
Warning
KKL is configured to use Manual Expressions by default. This allows you to carefully create the posing you want in your sprites. Switching to Auto mode will mess up your chosen emotions and make it difficult for you to reset back.
These are the "cartoony" emotion effects, which may or may not be useful depending on the character and pose. None of us could come up with a better name than "Emote Eyes".
Facial Posing
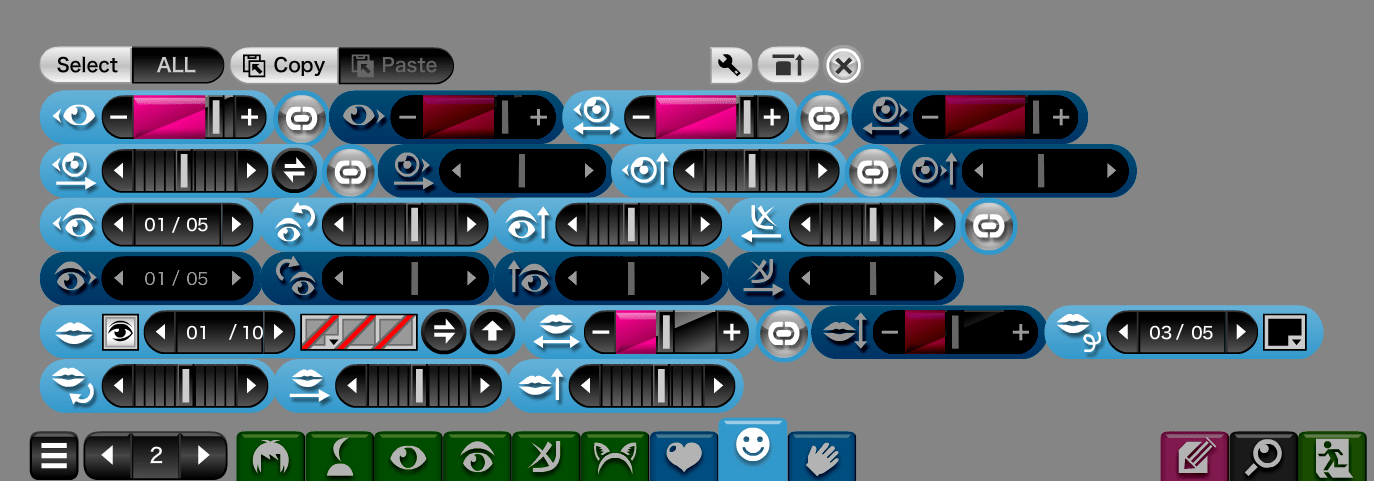
| - | - | - | - | - |
|---|---|---|---|---|
| Right Eye Openness | Left Eye Openness | Right Iris Size | Left Iris Size | |
| Right Iris Horizontal Position (with Mirroring Toggle and link toggle) | Left Iris Horizontal Position | Right Iris Vertical Position (with link toggle) | Left Iris Vertical Position | |
| Right Eyebrow Mode | Right Eyebrow Rotation | Right Eyebrow Vertical Position | Right Eyebrow Horizontal Position (and link toggle) | |
| Left Eyebrow Mode | Left Eyebrow Rotation | Left Eyebrow Vertical Position | Left Eyebrow Horizontal Position | |
| Mouth Selector (with visibility toggle, flip button, and layer button) | Mouth Width (with link toggle) | Mouth Height | Mouth Outline Thickness | |
| Mouth Rotation | Mouth Horizontal Position | Mouth Vertical Position |
Use the Eye Openness slider to make a character close their eyes by dragging it to the left end. Use the Mirroring Toggle to change how the Iris Horizontal Position movement works, either both in same direction or both in opposite directions.
Only a handful of mouths are actually any good. Past the fifties be dragons.
Breast Movement

| - | - | - | - | - | - | - | - | - | - |
|---|---|---|---|---|---|---|---|---|---|
| Right Breast Bounce (Auto Only) | Left Breast Bounce (Auto Only) | Right Breast Side Bounce (Auto Only) | Left Breast Side Bounce (Auto Only) | Right Nipple Tweak Vertical (Auto Only) | Left Nipple Tweak Vertical (Auto Only) | Right Nipple Tweak Horizontal (Auto Only) | Left Nipple Tweak Horizontal (Auto Only) | Auto Vaginal Touch | Auto Lip Touch |
| Auto vs. Manual Switch | Right Breast Positions | Left Breast Positions | Right Nipple Positions | Left Nipple Positions |
Unlike the Emotions & Emotes tab, a character can work perfectly well with Breast Movement set to Auto. Set to Manual only if you need finer control.
The Auto Vaginal Touch switch causes the model to gain Love Juice quickly, similar to clicking the vagina directly. The Auto Lip Touch gives them a kissy face and only works with characters that have their emotions set to Auto in the Emotions & Emotes tab above.
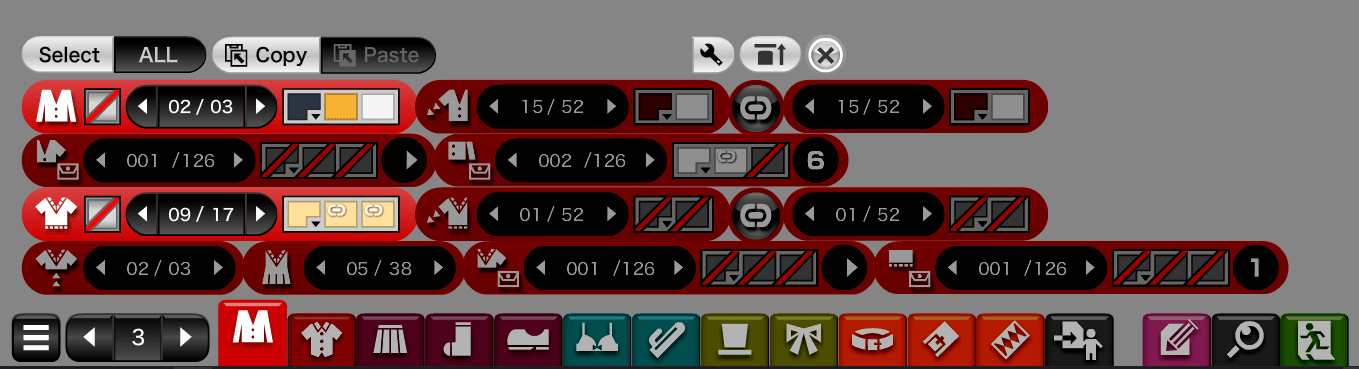
Tops
Jackets and Sweaters
| - | - | - | - |
|---|---|---|---|
| Jackets | Jacket Right Sleeves (with link toggle) | Jacket Left Sleeves | |
| Jacket Breast Pockets (plus Color Picker and Mirroring Button) | Jacket Side Pockets (With Color Picker and Position Number) | ||
| Sweaters | Sweater Right Sleeves (with link toggle) | Sweater Left Sleeves | |
| Sweater Top Style | Sweater Hem Style | Sweater Breast Pockets (plus Color Picker and Mirroring Button) | Sweater Side Pockets (With Color Picker and Position Number) |
For the Breast Pocket selectors, 001 is "no pocket (or decoration)". Same with the Side Pocket selector. The Position Number on the side pockets serves the same function as a selector, the number refers to one of 15 different positions for the pockets.
Only some Jacket and Sweater Sleeves have options in the Color Picker, otherwise they default to the Jacket or Sweater color respectively.
Collared and T-Shirts
| - | - | - | - |
|---|---|---|---|
| Collared Shirts | Collars (with Collar Style button) | Collared Shirt Right Sleeves (with link toggle) | Collared Shirt Left Sleeves |
| Collared Shirt Top Style | Collared Shirt Hem Style | Collared Shirt Breast Pockets (plus Color Picker and Mirroring Button) | Collared Shirt Side Pockets (With Color Picker and Position Number) |
| T-Shirts | T-Shirt Right Sleeves (with link toggle) | T-Shirt Left Sleeves | |
| T-Shirt Top Style | T-Shirt Hem Style | T-Shirt Breast Pockets (plus Color Picker and Mirroring Button) | T-Shirt Side Pockets (With Color Picker and Position Number) |
The Collar Style button allows you to choose one of six different color configurations for the collar.
The Side Pockets and Breast Pockets function the same as the ones in the Jackets and Sweaters tab above. Same with sleeves.
Bottoms
Skirts, Pants, and Tights

| - | - | - |
|---|---|---|
| Skirts (plus Color Picker and Layer Button) | Tights and Pantyhose (plus Color Picker and Layer Button) | |
| Pants | Right Pant Cuff Style (and link toggle) | Left Pant Cuff Style |
Fairly self-explanatory. The Pants controls can be used to mix and match styles.
Socks and Anklets

| - | - |
|---|---|
| Right Sock (and link toggle) | Left Sock |
| Right Anklet (and link toggle) | Left Anklet |
You can use the Socks selector to make thigh-highs too.
Shoes and Boots

| - | - |
|---|---|
| Right Shoe | Right Boot Cuff |
| Left Shoe | Left Boot Cuff |
Only some Shoe styles have Boot Cuffs available.
Undies and Other Lewd Things
Underwear and Swimsuits, Shibari, Pasties, and Piercings
| - | - | - | - |
|---|---|---|---|
| Bra (with Top Toggle and link toggle) | Underwear (with Layer Button) | ||
| Shibari | Maebari | Maebari Size | |
| Right Breast Pasties and Piercings | Right Breast Pasties and Piercings Size (with link toggle) | Left Breast Pasties and Piercings | Left Breast Pasties and Piercings Size |
The Top Toggle button next to the Bra color picker is only available for some bras. It allows you to have only the top portion of the item, only the bottom, or both. The Layer Button on the Underwear controls adjusts whether they appear above or below a one-piece top (e.g. the swimsuits).
Shibari is bondage rope, while Maebari are similar to pasties, but for the crotch.
Dildos

| - | - | - | - | - |
|---|---|---|---|---|
| Dildo Selector | Dildo Size | Toggle to Allow Insertion Through Clothing | Animation Type (With Loop Toggle and Character Animation Toggle) | Animation Speed (with Loop Toggle) |
| Dildo Opacity |
This tab might not ever be used, depending on whether or not your character uses a toy during their masturbation sequence.
The Loop Toggle autoplays all stages of animation speed and type in a continuous loop. 01 for Animation Speed is perfectly still (in case you need to take a picture of one specific animation frame). The Character Animation Toggle determines whether or not the character moves with the Dildo. The Dildo Opacity slider allows for hiding the dildo while keeping the vagina more open than manual controls can. This is useful for posing for forefeits and epilogues.
Headwear
Hats, Glasses, Masks, etc.
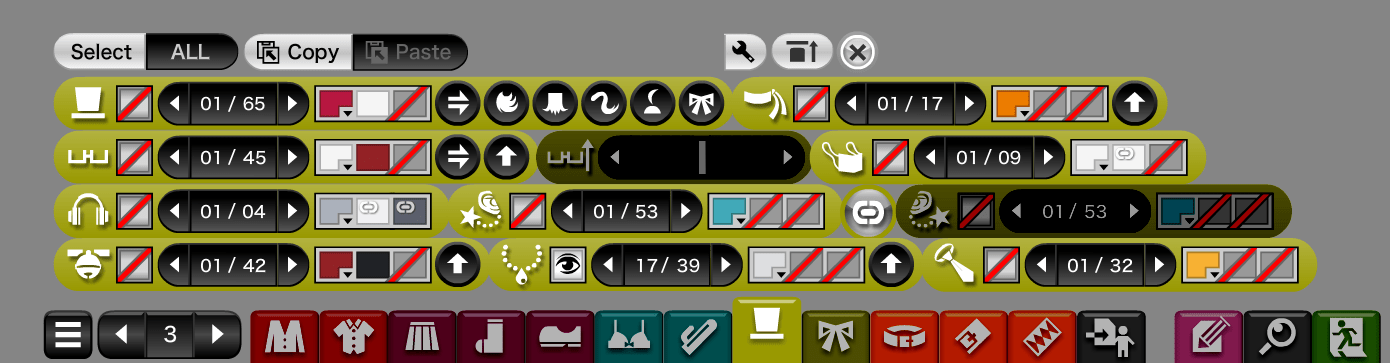
| - | - | - |
|---|---|---|
| Hats (with Flip Button, Bangs Toggle, Back Hair Toggle, Side Locks Toggle, Hair Piece Toggle, and Ribbon Toggle) | Headband (and Layer Button) | |
| Glasses (with Flip Toggle and Layer Button) | Glasses Vertical Position | Masks |
| Headphones and Earmuffs | Right Earring (with link toggle) | Left Earring |
| Collars and Scarves (with Layer Button) | Necklaces (with Layer Button) | Neckties |
The various toggles next in the Hat controls (Bangs Toggle, Back Hair Toggle, Side Locks Toggle, Hair Piece Toggle, and Ribbon Toggle) are just quick ways to toggle whether or not those pieces show up when a hat is worn.
You can click Headphones and some Neckties to adjust their position.
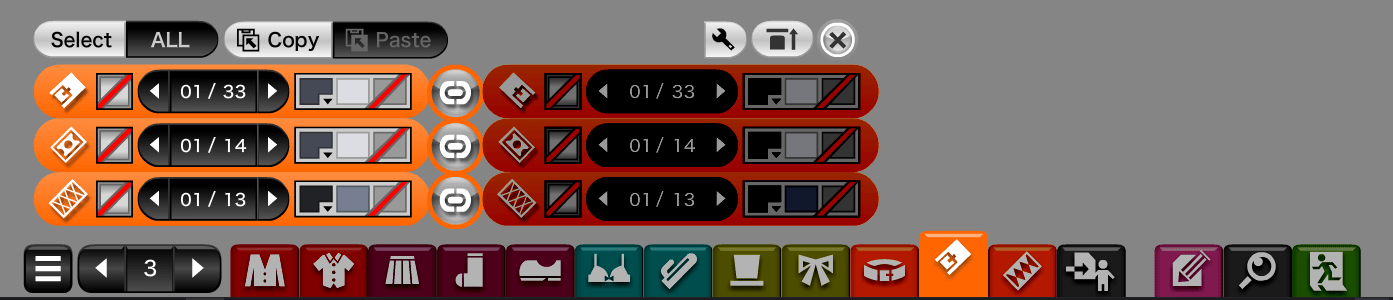
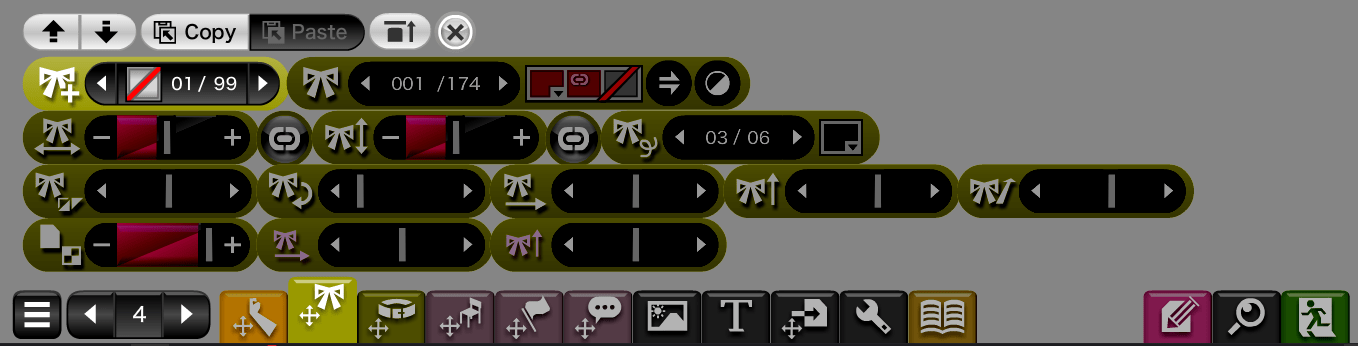
Ribbons
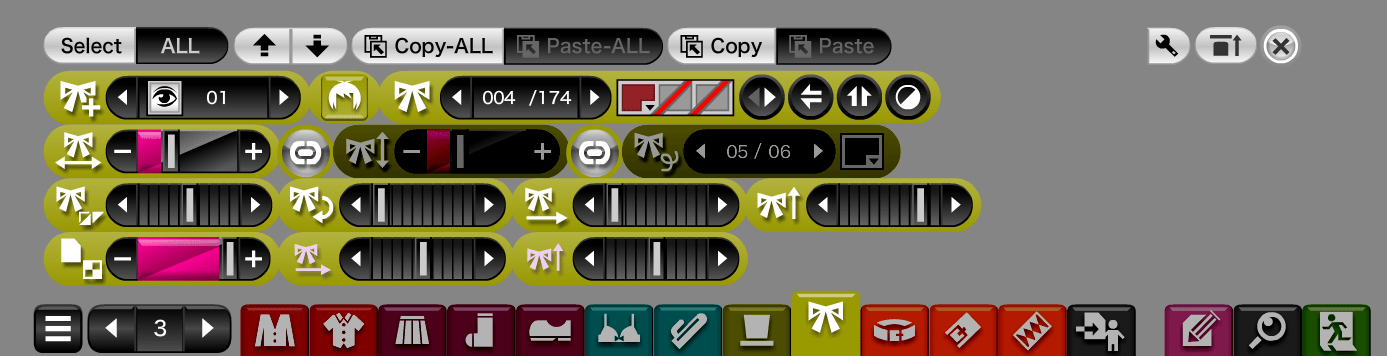
| - | - | - | - |
|---|---|---|---|
| Ribbon Slots | Ribbon Anchoring Location | Ribbon Selector (plus Color Picker, Mirroring Button, Layer Button, and Shading Toggle) | |
| Ribbon Width (and link toggle) | Ribbon Height (and link toggle) | Ribbon Outline Width | |
| Ribbon Skew | Ribbon Rotation | Ribbon Horizontal Position | Ribbon Vertical Position |
| Ribbon Opacity | Sub-Pixel Ribbon Horizontal Position | Sub-Pixel Ribbon Vertical Position |
Possibly one of the most important Tabs in Kisekae. Use the Ribbon Placement Location to pin ribbons to the two body points, arms or legs, and you can build almost any item of clothing. The options to pin ribbons are: Head, Front Hair,Chest (Legacy), Torso (Legacy),Back Hair, Side Locks,the first five Hairpiece slots, Thighs, Calves, Feet, Upper Arms, Lower Arms, Hands, Chest (Advanced), Torso (Advanced), and Whole Body. Ribbons attached to part of the hair with Gravity toggled on will move with the hair.
Much of these controls are similar to Hairpieces above, and are explained in detail there.
Holding down shift when using the controls will adjust all ribbons at once. Holding down ctrl when using the controls will adjust all ribbons anchored to the point of the ribbon you currently are on.
Note
There are two distinct anchor points for the chest and torso. The first set, nicknamed ‘legacy’, work as originally programmed. They can not have their layer position changed with the layer button. The second set, exclusive to later versions of KKL, can have their layer position changed with the layer button, like their hair piece counterparts. You will know if you are using the first or second set by the color of the anchor location button. The first set is green and the second set is purple.
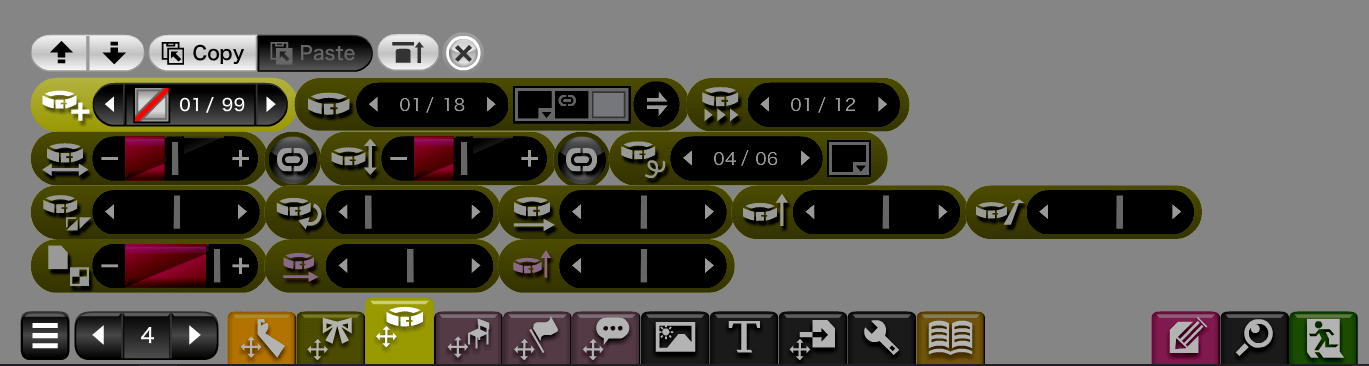
Belts and Bracelets
Belts

| - | - | - | - |
|---|---|---|---|
| Belt Slots | Belt Selector (plus Color Picker, Mirroring Button, Layer Button, and Mask Toggle) | Belt Position | |
| Belt Width (and link toggle) | Belt Height (and link toggle) | Belt Outline Width | |
| Belt Skew | Belt Rotation | Belt Horizontal Position | Belt Vertical Position |
| Belt Opacity | Sub-Pixel Belt Horizontal Position | Sub-Pixel Belt Vertical Position |
Another very important tab, though a first timer might not realize it. You can build a wide variety of clothing items out of belts. While a lot of things can now be done with Ribbons and Hair Pieces, the *Mask Toggle is very useful for quickly creating skirts and long coats.
The Mask Toggle affects whether a belt will only be as wide at the outline of a character, or whether the whole belt is visible at once. The Belt Position control allows you to choose what configuration you want the the belt in, the amount varies by belt. The curved rope belt configuration of Belt 08 allows you to make curved outlines.
Like ribbons, hair, and face marks, holding down shift when using the controls will adjust all belts. As there are no anchoring points for belts, holding down ctrl does nothing.
Bracelets and Sleeves
| - | - |
|---|---|
| Right Bracelet (with link toggle) | Left Bracelet |
| Right Upper Arm Cuff (with link toggle) | Left Upper Arm Cuff |
| Right Forearm Band (with link toggle) | Left Forearm Band |
The Bracelet selector also allows you to choose detached sleeves as well, perfect for making Vocaloids and shrine maidens.
Armbands, Elbow Bands, and Gloves
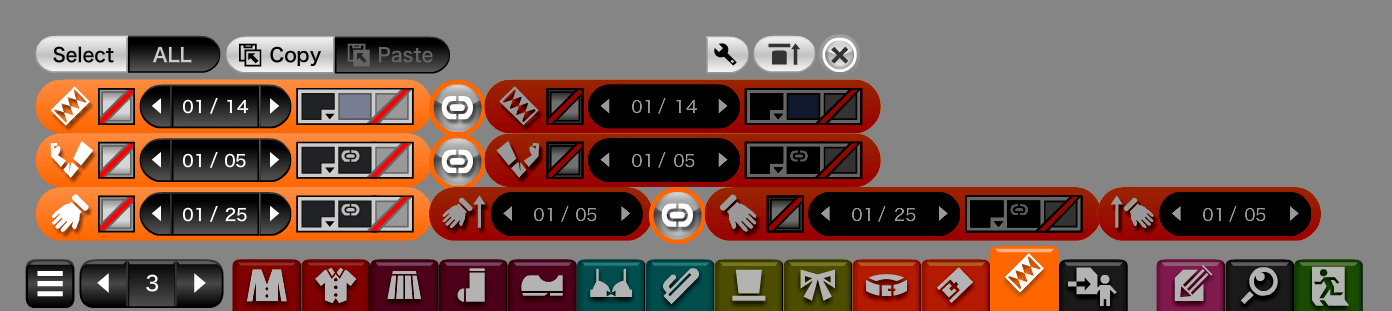
| - | - | - | - |
|---|---|---|---|
| Right Armband (with link toggle) | Left Armband | ||
| Right Elbow Pad (with link toggle) | Left Elbow Pad | ||
| Right Glove | Right Glove Length (with link toggle) | Left Glove | Left Glove Length |
No special clarifications needed.
Image Attachments
Character Image Attachments
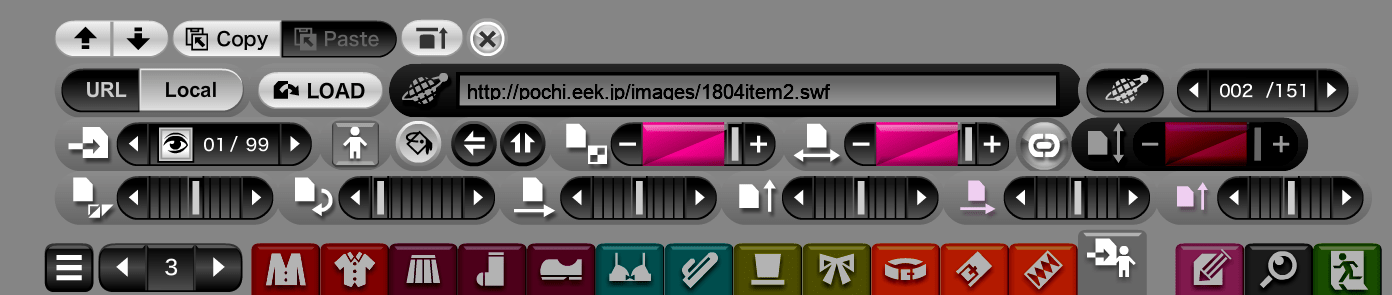
| - | - | - | - | - | - | - |
|---|---|---|---|---|---|---|
| URL vs. Local Toggle | Load Button | Image Path Input Field | Image URL List | Pochi DLC Images | ||
| Attachment Slots | Attachment Placement Location | Paint Bucket (Pochi DLC Images only) | Flip Button and Layer Button | Attachment Opacity | Attachment Width (with link toggle) | Attachment Height |
| Attachment Skew | Attachment Rotation | Attachment Horizontal Position | Attachment Vertical Position | Sub-Pixel Attachment Horizontal Position | Sub-Pixel Attachment Vertical Position |
Image attachments allow you to take a .png or .swf image from outside of Kisekae, and import as part of your model. This gives you much more freedom when making art for your character. You can even make art in Kisekae, export as a .png file, and re-import to save ribbon or hair piece slots. Re-importing as an image attachment means you need to only deal with one piece instead of many.
The URL vs. Local Toggle determines whether you will use an image from online or your local hard drive. The Load Button either loads an image from online, or allows you to navigate to the location of an image on your HDD. When loading an image from your drive, the Image Path Input Field will be filled automatically. You can use the Attachment Anchoring Location to pin attachments to the body, head, left and right upper arms, left and right forearms, left and right hands, left and right thighs, left and right calves, and left and right feet. Much like the ribbons, there is legacy and new anchor points for everything except for the body.
Note
You can auto-load image attachments onto a saved model by putting them in an images folder in the same directory as kkl.exe (.swf files can only be loaded in this method). Make sure your image file names do not use spaces or other illegal characters.
Note
.svg files do not always work with KKL. It is reccomended you use .swf or .png files instead.
Global Items
These are items which do not anchor to an individual Character, but exist as part of the Scene. These can only be saved as part of an All code, not a Select code.
Global Arms
| - | - | - | - | - |
|---|---|---|---|---|
| Global Arm Slot | Global Arm Style (with Color Picker and Flip Button | Global Arm Opacity | Global Arm Size | Global Arm Thickness |
| Global Arm Rotation | Global Arm Horizontal Position | Global Arm Vertical Position | Global Arm Depth | |
| Hand Selector | Wrist Rotation | Sub-Pixel Global Arm Horizontal Position | Sub-Pixel Global Arm Vertical Position | |
| Held Item Selector | Sleeves | Bracelets |
Note that not every option for normal arms are available for global arms. These can be useful if you need an arm to wrap around another character or go over an image attachment, and can't use an outside image editor or don’t want to use multiple models.
Global Ribbons
| - | - | - | - | - |
|---|---|---|---|---|
| Global Ribbon Slots | Global Ribbon Selector (plus Color Picker, Flip Button, and Shading Toggle) | |||
| Global Ribbon Width (and link toggle) | Global Ribbon Height (and link toggle) | Global Ribbon Outline Width | ||
| Global Ribbon Skew | Global Ribbon Rotation | Global Ribbon Horizontal Position | Global Ribbon Vertical Position | Global Ribbon Depth |
| Global Ribbon Opacity | Sub-Pixel Global Ribbon Horizontal Position | Sub-Pixel Global Ribbon Vertical Position |
Mostly the same as regular Ribbons. If you want to build something to re-import as an attachment, you can use these and export an image without the model. Otherwise, you'll want to use the first kind of Ribbons.
Global Belts
| - | - | - | - | - |
|---|---|---|---|---|
| Global Belt Slots | Global Belt Selector (plus Color Picker and Flip Button) | Global Belt Position | ||
| Global Belt Width (and link toggle) | Global Belt Height (and link toggle) | Global Belt Outline Width | ||
| Global Belt Skew | Global Belt Rotation | Global Belt Horizontal Position | Global Belt Vertical Position | Global Belt Depth |
| Global Belt Opacity | Sub-Pixel Global Belt Horizontal Position | Sub-Pixel Global Belt Vertical Position |
Basically everything above, just replace "ribbons" with "belts".
Props
| - | - | - | - | - |
|---|---|---|---|---|
| Prop Slots | Prop (with Color Picker and Flip Button | Prop Orientation | Prop Size (with link toggle) | |
| Prop Line Width | Prop Rotation | Prop Horizontal Position | Prop Vertical Position | Prop Depth |
| Prop Opacity | Sub-Pixel Prop Horizontal Position | Sub-Pixel Prop Vertical Position |
This may be useful to you and your character, or you might never touch this tab. Props are rarely needed for character sprites.
Flags

| - | - | - | - | - |
|---|---|---|---|---|
| Flag Slots | Flag Selector | Flag Style | Flag Width (and link toggle) | Flag Height |
| Flag Skew | Flag Rotation | Flag Horizontal Position | Flag Position Vertical | Flag Depth |
I don’t think this tab gets used in or outside of SPNatI spritework. Many people go their entire career without using the tab.
Speech Bubbles
| - | - | - | - | - |
|---|---|---|---|---|
| Speech Bubble Slot | Speech Bubble Selector (with Color Picker and Flip Button) | Speech Bubble Opacity | Speech Bubble Blend Mode | |
| Speech Bubble Width (and link toggle) | Speech Bubble Height | Speech Bubble Outline Width | Speech Bubble Skew | Speech Bubble Rotation |
| Speech Bubble Horizontal Position | Speech Bubble Postion Vertical | Speech Bubble Depth | Speech Bubble Tail Selector (and Flip Button) | Tail Outline |
| Tail Width (and link toggle) | Tail Height | Tail Rotation | Tail Horizontal Position | Tail Vertical Position |
Speech Bubbles can be used for their intended purpose (being speech bubbles), but one can also use them for light effects or shading. Keep in mind however, like all Global assets Speech Bubbles don't move with the character.
Speech Bubbles aren't significantly used in SPNatI spritework.
Backgrounds

| - | - | - |
|---|---|---|
| Background | Horizon Point | Floor |
| Stage Cutout | Foreground Audience |
SPNatI Sprites are exported without a background. However, you might want to make a more neutral background for character creation, or create a background for an epilogue.
Text

| - | - | - | - | - | - |
|---|---|---|---|---|---|
| Text Field | Font (and Color Picker) | Text Direction | Paragraph | Text Placement Location | Layer Button |
| Text Opacity | Font Size | Text Width (and link toggle) | Text Height | Text Field Size | |
| Text Skew | Text Rotation | Text Horizontal Position | Text Vertical Position | Leading | Kerning |
Since the character's text is written in the CE, and their speech bubbles are part of the game, you'll rarely need to make text within Kisekae. You may find a need for it outside of SPNatI work, however.
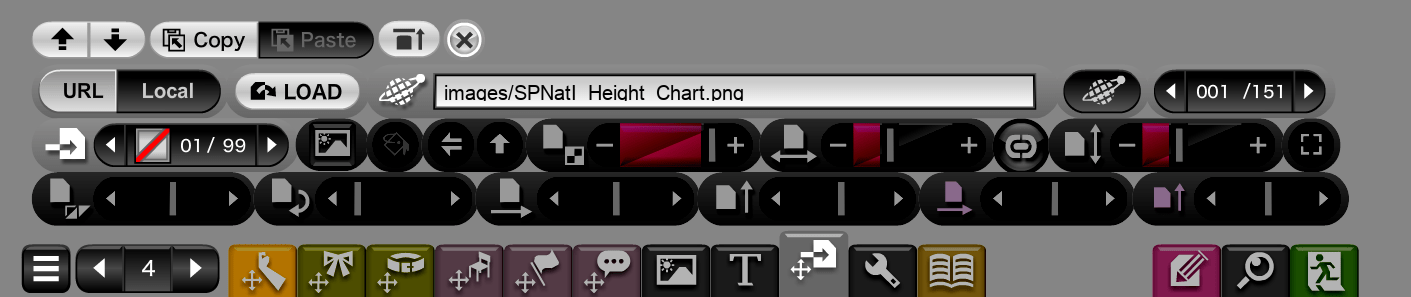
Global Image Attachments
| - | - | - | - | - | - | - | - |
|---|---|---|---|---|---|---|---|
| URL vs. Local Toggle | Load Button | Image Path Input Field | Image URL List | Pochi DLC Images | |||
| Attachment Slots | Attachment Placement Location | Paint Bucket (Pochi DLC Images only) | Flip Button and Layer Button | Attachment Opacity | Attachment Width (with link toggle) | Attachment Height | Auto-Scale to Full Size |
| Attachment Skew | Attachment Rotation | Attachment Horizontal Position | Attachment Vertical Position | Sub-Pixel Attachment Horizontal Position | Sub-Pixel Attachment Vertical Position |
Like image attachments, but global. In the screenshot above is the SPNatI height chart, one of the many uses for this tab and an important tool in character creation.
You can attach global attachments to word balloons using the Attachment Placement Location.
Settings
Settings

| - | - | - | - | - |
|---|---|---|---|---|
| Hide/Show Tab Bar | Arrow Marker Position | Numerical Display | Volume | Stereo/Mono Output |
| Image Quality | Censorship | Easy/Expert Toggle | Shortcut Keys | Breakout |
Danger
By default, KKL is set to Expert Mode. Do not switch out of Expert Mode. You will have far fewer options available for character customization. Additionally, Easy Mode changes the locations of a number of important controls, which this guide does not take into account. This includes the toggle for switching back to Expert Mode, which will be located in the Image Export Tab (with the magnifying glass icon).
Hide/Show Tab Bar: Toggles whether or not the rows at the bottom will be visible when all tabs are closed and the mouse is moved away.
Arrow Marker Position: Toggles whether or not the yellow marker appears above or behind a selected character. [Also activated using the V key.]
Numerical Display: Toggles showing the exact number selected on all sliders. [Also activated using the M key.]
Volume: Not remotely useful for SPNatI work. In the original kisekae, there used to be a sound effect for kissing a model (clicking their mouth with expressions set to auto), but it has been long removed.
Stereo/Mono Output: By default, set to stereo (checked).
Image Quality: The quality of the Kisekae screen.
Censorship: Setting 8 is "no censorship", which KKL is set to by default. Do not change this setting.
Easy/Expert Toggle: Eeeh? Easy Mode? How lame! Only kids play in easy mode!! Kya ha ha ha ha ha ha!!
Shortcut Keys: Assign shortcut keys to various tabs, or change the default keyboard shortcuts.
Breakout: Play the game Breakout, except with clothes as the blocks. Because of the new layering system, certain ribbons are immune to the breakout ball.
Unused
Gif Maker

| - | - | - | - | - |
|---|---|---|---|---|
| Preview | Save and Load (as .txt) | Internal Save | Output as Gif | Gif Animation Speed |
| Frame List | Add/Remove Frames | Frame Selector |
The Gif Maker is completely unused in SPNatI's workflow. All in-game animation is built in the Character Editor, using the Pose Maker.
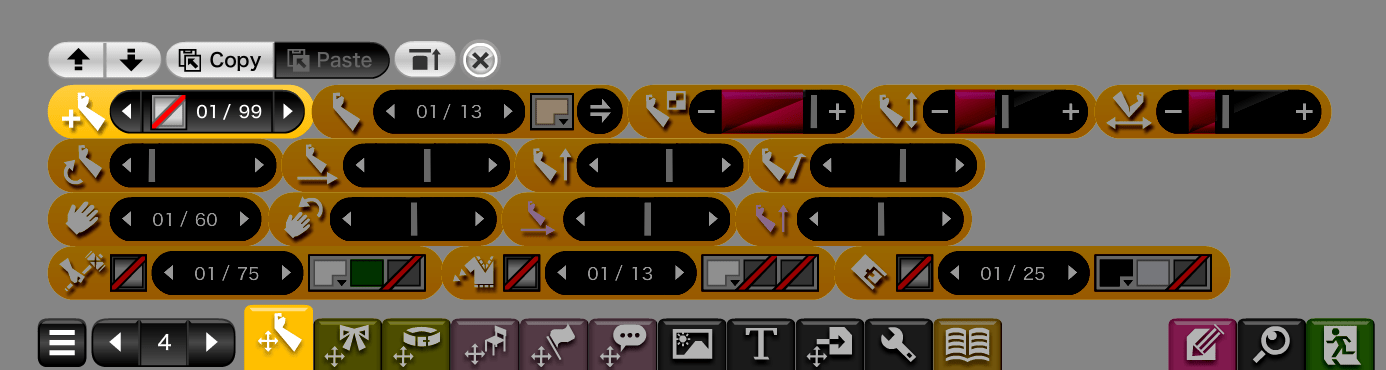
Main Tabs
Save and Load

| - | - | - | - |
|---|---|---|---|
| Save and Load (as .txt) | Import and Export (as code) | Internal Save | Save and Load All Internal Saves |
Note
Save and Load (as .txt) is the most secure way to save your data, as you can back up these files. Internal Saves stores data as cookies, which can get wiped due to glitches or user error.
Save and Load (as .txt): The Save button saves the entirety of your Kisekae project as a .txt file wherever you choose on your hard drive. The Load button opens a saved .txt file and loads it in Kisekae.
Import and Export: Opens a window where you can copy and paste character and scene codes. These are the same codes generated by the Save and Load options. Unlike the above option, with Import and Export you can only import or export partial codes (e.g. copy another character's shirt onto your own). Choose Select to only export the selected character's code, or select All to export everything (including Global Objects).
Warning
The first three numbers in a Kisekae code denote the version it was saved in. We don't recommend trying to import newer codes into an older version of KKL.
Additionally, codes from KKL will likely not work in online Kisekae or newer versions of kisekae, as KKL has been modified to have additional Hairpiece, Belt, and Ribbon slots. The new sleeves, irises, horns, and underwear from kisekae version 183 and onwards will not work when imported into any version of KKL. There is currently no plan to make them compatible, as reordering the sleeves as Pochi has would destroy many models.
Internal Save: Saves the code on your PC using cookies. Unlike .txt files, these cannot be backed up or shared with others and are lost if you clear your cookies. However, this method also saves characters that have been toggled off in the Preset Attributes tab.
Save and Load All Internal Saves: Bulk exports all the above Internal Saves as .txt files. Note that importing using Load-All will overwrite all internal saves.
Image Export

| - | - | - |
|---|---|---|
| Zoom | Fullscreen Mode | Image Size |
| PNG (Transparency) | JPG (JPG Quality) | Cropping (X Coordinate, Y Coordinate, Width, Height) (Mouse Selection) |
Zoom 7 is the default for SPNatI-sized models. Whenever exporting, always use Image Size 5/5 for best quality. KKL 108.1 does this for you automatically. Export as PNG with Transparency toggled on (made light grey instead of dark grey).
For Cropping, enable it by checking the crop tool. You can either manually enter a range using the Coordinate and Width and Height controls, or toggle on the Mouse Selection and choose an area by clicking and dragging.
The Character Editor automatically handles cropping and exporting images at SPNatI size and resolution. It's better in almost all instances to export your poses through there.
Emergency Exit

| - |
|---|
| Emergency Exit |
Turns the screen black, in case your mom comes in the room.
Important Tricks and Tips
Space Bar
Holding down the Space Bar when using most sliders allows you to go beyond the normal 0 to 100 range. This allows you far more freedom in model customization, especially when it comes to making custom clothing.
Note
Later versions of KKL introduced a toggle to make holding the spacebar permanent for as long as you have the game open. This can be done by pressing f12 once.
Keyboard Shortcuts and Modifiers
General
| Key | Action |
|---|---|
| Space + Click | Hide items that can't be removed by normal clicking (Love Juice, Hair, Emote Bubbles, etc.) |
A |
Right Breast Bounce |
S |
Left Breast Bounce |
Z |
Right Breast Jiggle |
X |
Left Breast Jiggle |
D |
Crotch Stimulation |
F |
Kiss |
| Arrow Keys | Move Screen |
| Space + Arrow Keys | Move Screen Beyond Normal Constraints |
Q |
Zoom In |
W |
Zoom Out |
E |
Set Zoom to 0 |
M |
Show Slider Value |
V |
Layer Selected Marker |
< |
Previous Row |
> |
Next Row |
7 |
Increase Body Height |
7 + Shift |
Decrease Body Height |
7 + Control |
Reset Body Height |
8 |
Increase Body Width |
8 + Shift |
Decrease Body Width |
8 + Control |
Reset Body Width |
9 |
Increase Underwear Transparency |
9 + Shift |
Decrease Underwear Transparency |
9 + Control |
Reset Underwear Transparency |
Import/Export (Save and Load Tab)
| Key | Action |
|---|---|
| Space + Click | Turn Off/On All Tabs |
Hair Tab
| Key | Action |
|---|---|
1 |
Match All Hair Colors With Base Hair Color |
2 |
Match All Outline Colors with Base Outline Color |
3 |
Toggle All Hair Outlines (On, 50%, and Off) |
Ears, Horns, and Tails Tab
| Key | Action |
|---|---|
1 |
Match Ear and Tail Color to Hair Color |
2 |
Match Ear and Tail Outline Color to Hair Outline Color |
3 |
Toggle Ear and Tail Outlines (On, 50%, and Off) |
Mass-Adjusting Pieces (KKL Only)
- Holding Shift while mirroring will flip all hairpieces/ribbons.
- Holding Ctrl while mirroring will flip all hairpieces/ribbons with the same attachment point.
- Holding Shift while clicking the up (down) arrow will move all hairpieces/ ribbons in the slots before or after it up or down one slot.
- Holding Space + Shift while clicking the up (down) arrow will move all hairpieces/ ribbons in the slots before or after it up or down ten slots.
- Holding Ctrl while clicking the up (down) arrow will move all hairpieces/ ribbons in the slots before or after it and in the same contiguous slot group up or down one slot.
- Holding Shift while clicking a slider arrow button will adjust all hairpieces/ ribbons.
- Holding Ctrl while clicking a slider arrow button will adjust all hairpieces/ ribbons with the same attachment point.
Selector Menu Functions (KKL Only)
- Holding Shift while navigating a selector menu will cycle through visible slots.
- Holding Ctrl while navigating a selector menu will cycle through unused slots.
- Holding Ctrl+Shift while navigating a selector menu will cycle through contiguous groups of visible or unused slots.
- Clicking on a ribbon, belt, image, hair piece, or face mark while holding Ctrl+Shift will automatically navigate to the tab and slot for the clicked part.
Toggles and Functions (KKL Only)
- Pressing F12 will toggle between the normal action of Space on sliders (hold Space to allow moving sliders beyond their limits) and the opposite.
- Pressing F11 will toggle between the normal action of Alt on slider arrows (hold Alt to move a slider ten steps at a time instead of one) and the opposite.
- Pressing F10 will toggle between the high resolution sliders and the legacy sliders. Parameter values are not rounded.
- Pressing Ctrl + Z will undo most actions. Pressing Ctrl + Y will redo them.
- Holding Alt while clicking an arrow will move a slider ten steps at a time.
Other Shortcuts
- Double-clicking a selector menu allows you to type in a number and jump to its corresponding option. This saves you a lot of time from cycling through menus.
- Clicking and holding the Select button allows you to multi-select models in place of selecting All.
Auto-Saves
In the event that you do press the dreaded Set button in the Hairpieces Tab, KKL automatically saves backup codes. These are stored in the same directory as kkl.exe, in an autosaves folder with the current date. Each file is labelled with the date and time it autosaved.
To use one of these backups to restore your model, load it into Kisekae the way you would any other .txt save.