How To Work on a Character Together Before They Hit Testing
A guide to collaborative workflow
When a character is on testing, uploading an update can be done via the handy SPNATI Utilities bot, and synchronizing with the latest updates for your offline version is as easy as pressing a button. (You can read how to do this in this linked guide.) If multiple people are working on one character, they can each push and pull changes like this and stay up-to-date with each others' progress. But what about for characters that haven't reached testing yet? Is there a better way than sending behaviour.xml files to each other via Discord? There sure is!
You can use the power of GitGud to make a one-button synchronize for your own personal projects. And you can push your own changes to these just as easily!
Note
This methodology is not officially supported by Git. Expect the possibility that this might fail, particularly at the most inopportune time.
Set-up
Step 1:
Install "GitHub Desktop". The method, purpose, and advantages of this are discussed in the guide linked above. Everybody working on a character should have this set up, even for solo projects.
Step 2:
Create an account on GitGud or log in to your account if you already have one. You don't need an account to synchronize your offline version, but you will need one for this side project. One can created an account by clicking the link that says "Sign in with Sapphire".

Step 3:
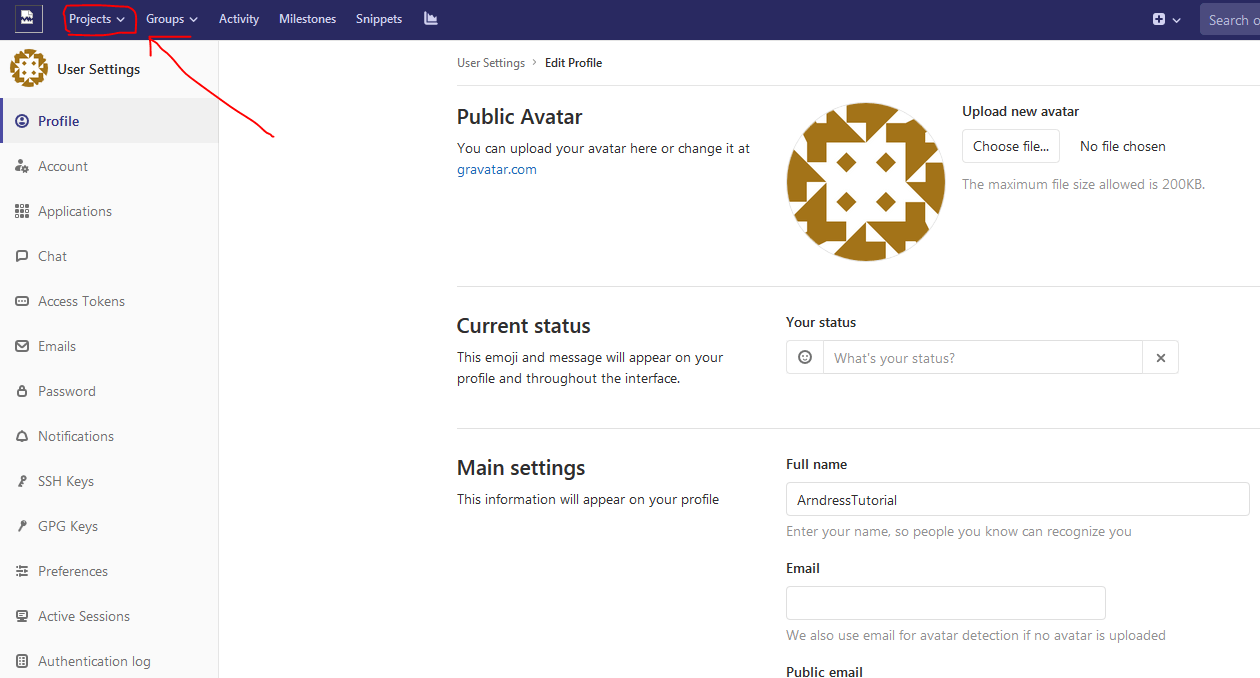
Go back to GitGud.io and sign in. If you just created an account, it will ask you if you want to connect to your new Sapphire account. Authorize this to continue. The first time you log into GitGud, it will ask for your e-mail address. Ultimately, we want to get over to the Projects button, but it won't let us until we give it this info. Supply this and update your profile to continue. You will need to validate your e-mail address by clicking a link in your e-mail to prove that it's your address.
Step 4:
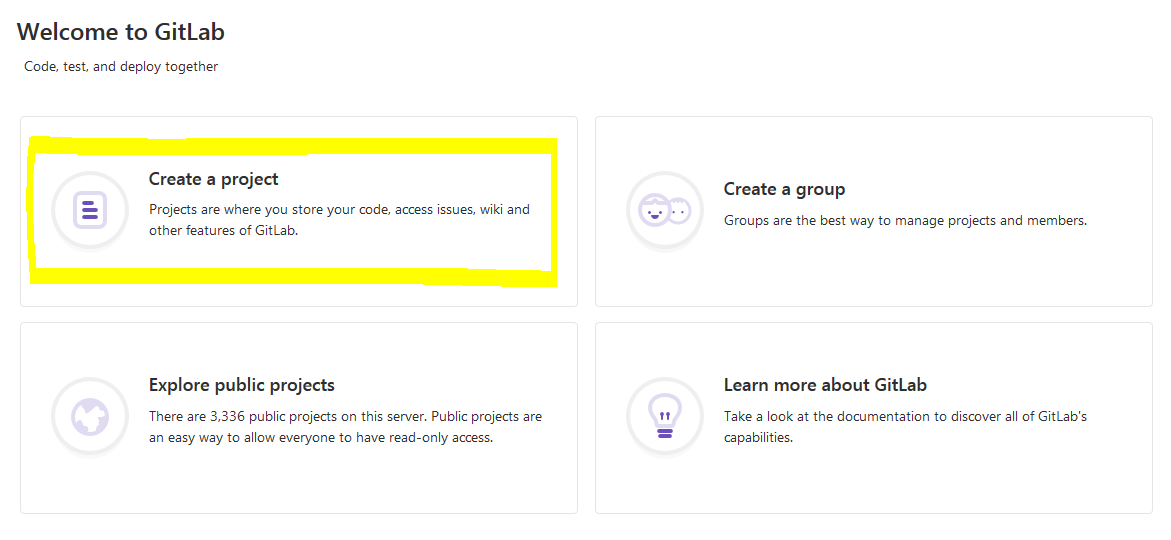
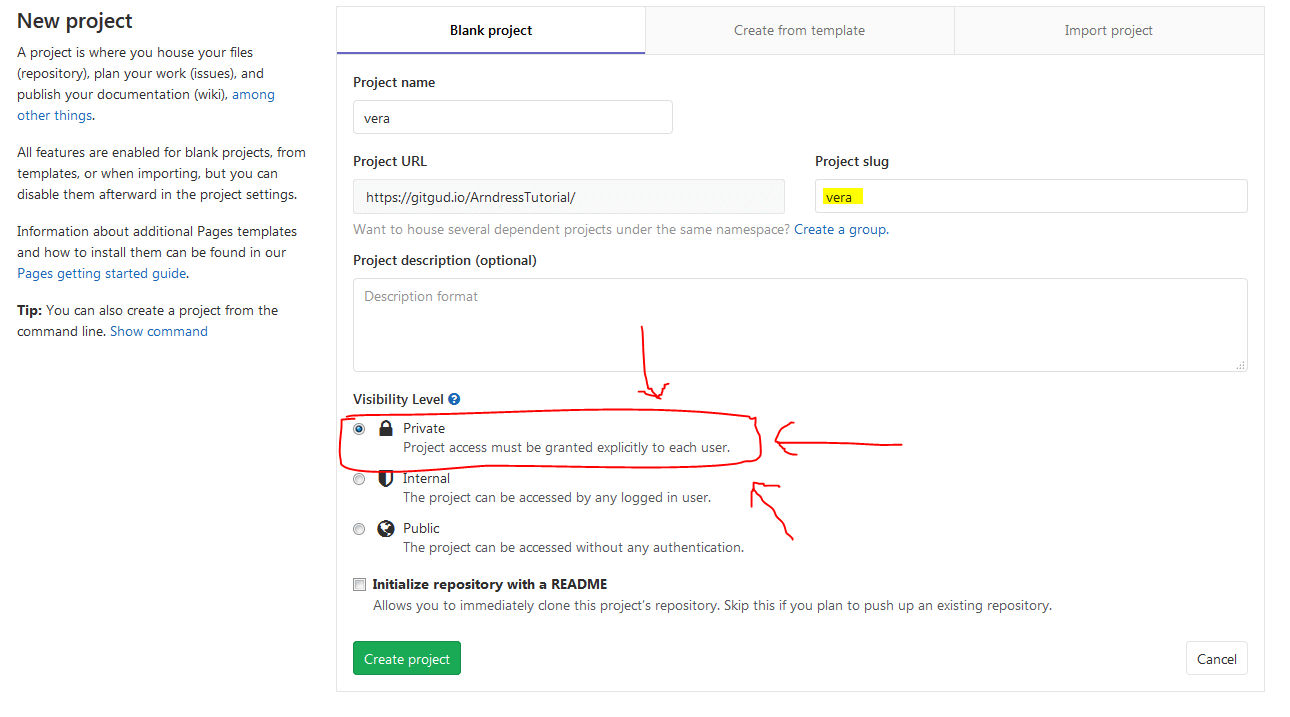
Just one member of your team will need to Create a Project. Name the project after your character, and if your project is a secret, set it as a Private project.
Step 5:
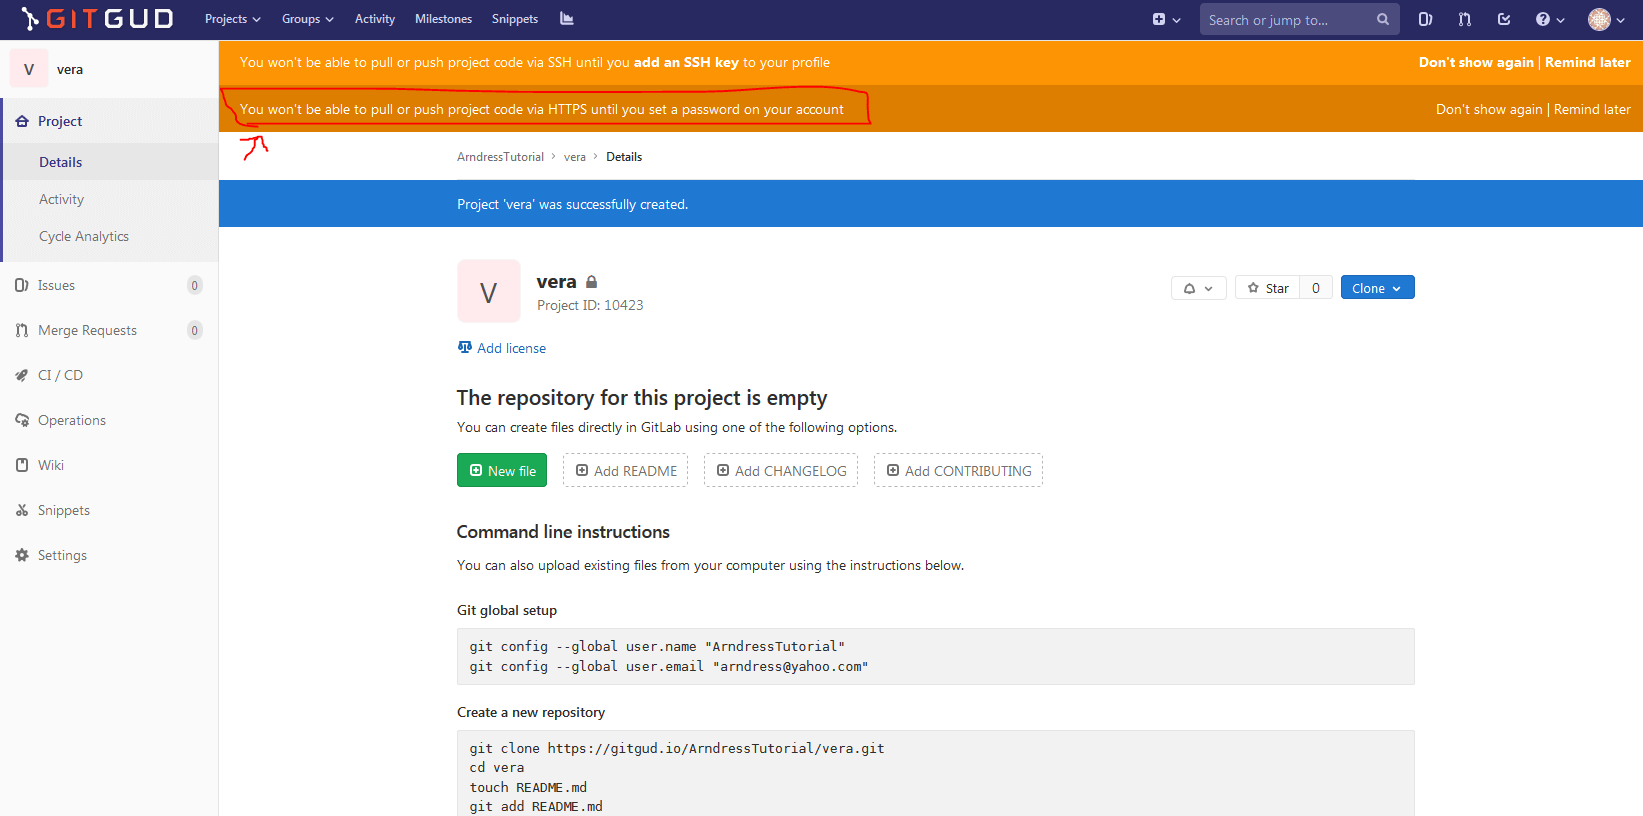
Set your GitGud password. For some reason, creating this for your Sapphire account wasn't enough. You will need a password to push and pull changes very soon. You can create your password by clicking your profile icon at the top right of the screen, clicking Settings, and then finding Password in the left sidebar.
Step 6:
Add members to your project. You can find this setting by clicking your new project's Settings and then Members. If you want other people to be able to contribute to this project, you will need to add them as members. Because the project is set to Private, they will also need to be added to even see the project. You can add people only after they've created their GitGud accounts. Give each member the role of Developer to allow them to make their own contributions.
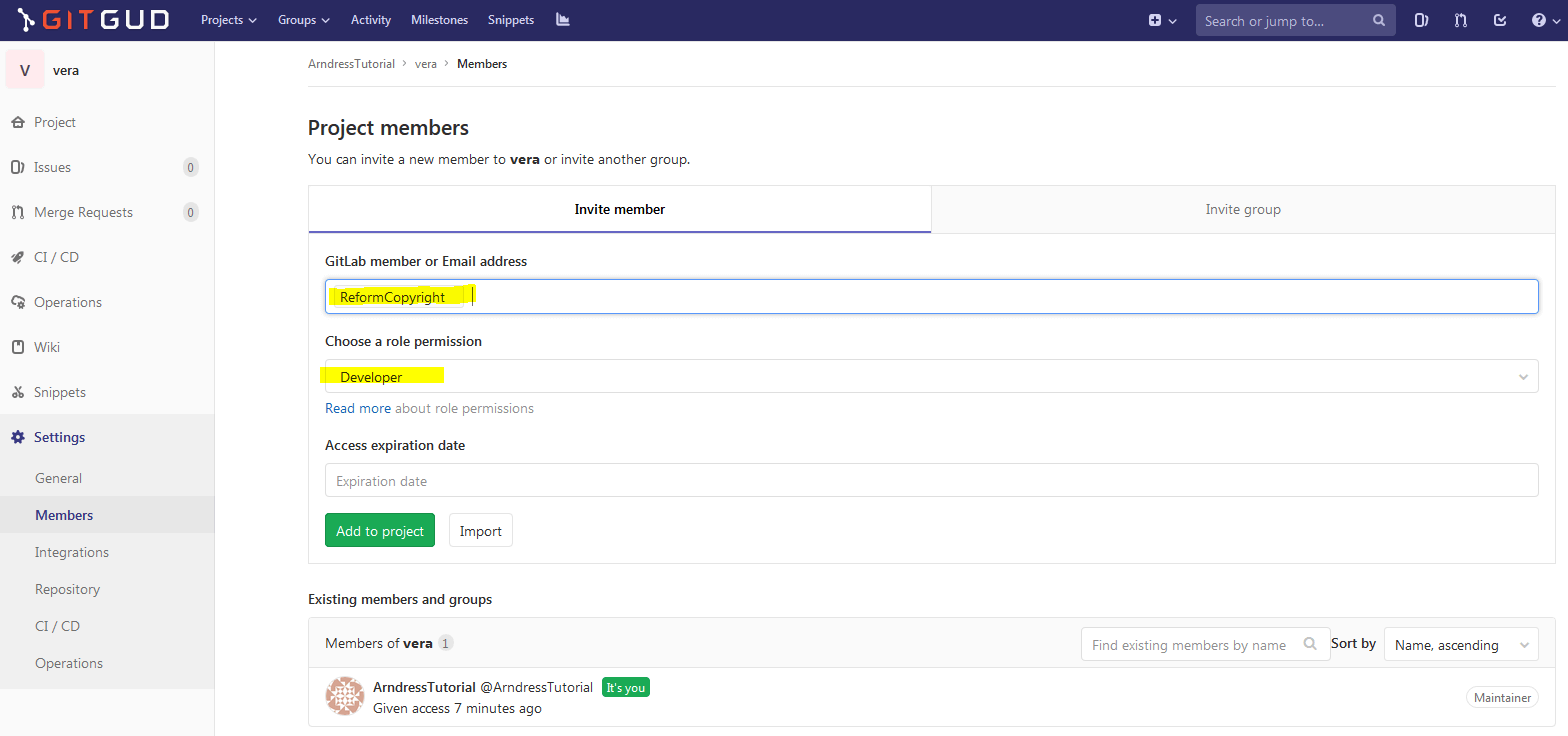
Step 7:
Now we're going to download a copy of the project. On the project page, find the blue Clone button and click it. Copy the "Clone with HTTPs" line. This step is identical to getting a copy of offline SPNatI, but on your personal project.
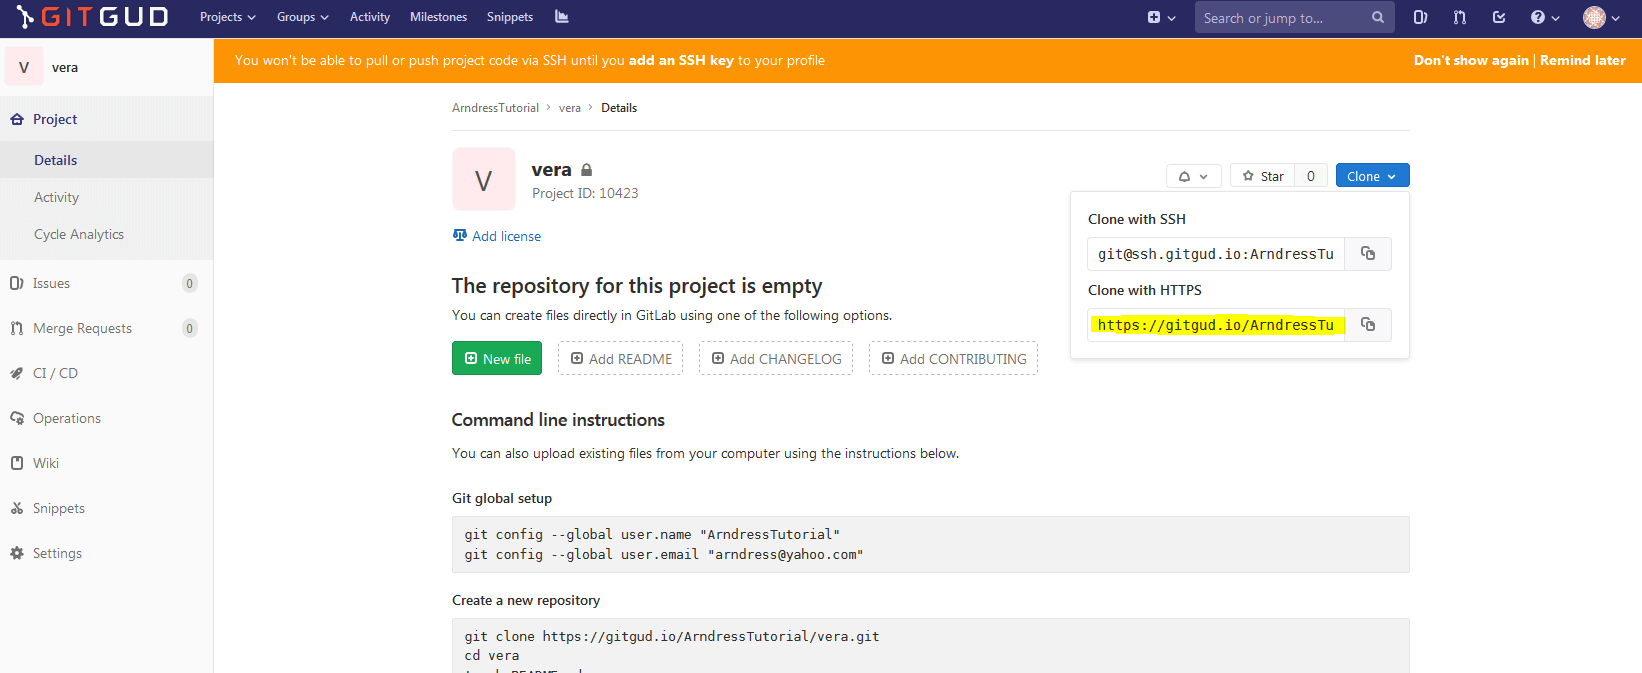
Step 8:
Open up GitHub Desktop. Add a repository, clicking Clone repository... For the URL, paste the URL you copied in step 7. (It will be different to the one you see in this screenshot.) For the local path, find the opponents folder of your offline version of SPNatI. This will automatically create the subfolder with your character's name. We're putting this repo inside another because this will allow us to instantly playtest the character without moving her or his files into this folder every single time there is a change. When you are ready to playtest, you will also need to add the character to listing.xml.
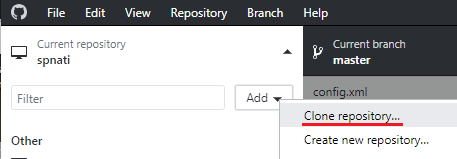
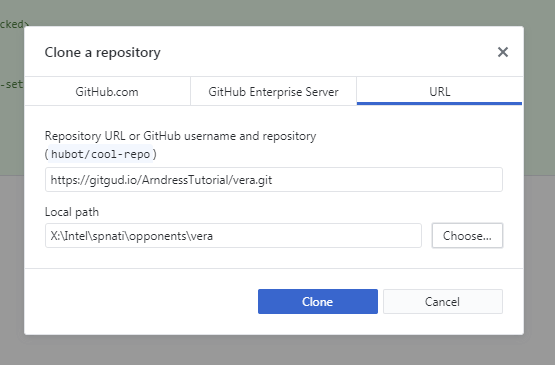
Step 9:
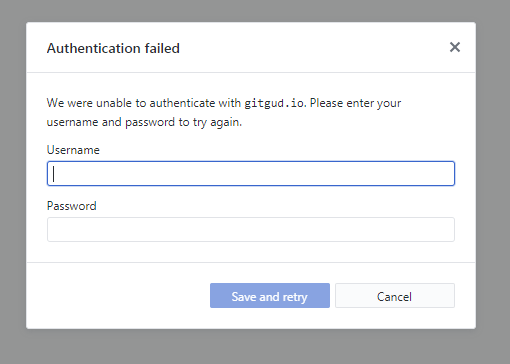
You will need to authenticate the first time you do this. Provide your GitGud username and password to prove you have permission to access these files. The cloning process should be almost instant because right now the repo is empty. This should complete your set up.
How to synchronize with character updates:
You can update your character the same way you update your offline version. Click "Fetch origin" in GitHub Desktop to retrieve any changes made since you last checked. You can swap between your offline version and this character project by clicking the "Current repository" button in the top left of GitHub Desktop.
How to commit your changes:
This is where the magic happens. Along the left side of the screen in GitHub Desktop, a list of files that are different from the project's online version will be displayed. To create a "commit", tick the boxes of the files you want to change and type a title for these changes in the Summary box. Click "Commit to master" to put this in an envelope, and click "Push origin" (where "Fetch origin" usually is) to post the envelope. Your changes are now sent for other team members to fetch!
If everything was set up correctly previously, team members should be able to push directly to the character's repository on Gitgud. This is the biggest difference with pushing to the main SPNatI repository, which requires you to create a merge request instead.
Tips:
Give a heads up to your team if you're about to start a writing session. While this method allows you to synchronize any changes instantly when these are pushed to the project, two people could still theoretically try to change the same file at the same time. Always Fetch Origin before you start editing.
If you are a game mod, you know that you have permissions to push changes to the main game itself. Remember to not push these character folder changes out to the main game, especially if this character is a secret! Also be careful with your modified listing.xml file.
Backups
You can also use the collaboration guide for a character you're working on solo.
You can have your own private GitGud repo for your character using the above method. Then when you make an update to her files that's in addition to your pending MR, commit these to the private repo. This will back her up there. Then when you switch back to the normal "spnati" repo and Pull the changes, you can safely "discard" your recent changes to her first. Then switch back again to your private repo for the character and "discard" the file changes you just pulled for her to return her to the state you committed her files. This is basically like just copying her folder to somewhere safe and pasting it back in, but it can be a bit safer.
As an additional note to the guide above, if you're setting this up for a character folder that already exists, the GitHub Desktop Client will ask for an empty folder instead. Rename the character's folder and make an empty one with the same name to replace it. Once the client has put its foundations into the new folder, you can paste the original folder's contents into the new folder. You can send the character as it is for the new repo's first commit. (You can commit directly via the client. You don't need an MR when it's your repo.)