How to Use Github Desktop to Submit Merge Requests
Send In Files The Old Fashioned Way
The SPNATI Utilities bot is a great resource for creators to quickly and easily keep their characters up to date, but it has a few drawbacks. You can't delete files, move existing files into a new sub-directory, or change the names of files. You can't use it to adjust files in an alt-costume, or submit minor bugfixes for others' characters.
Thankfully, you can submit any update you want, without hassle, by using the GitHub Desktop application. The Github Desktop Guide that I finally ported over from Reddit should take you through the steps required to set up everything you need.
As always, you can use Git via a command line interface to push changes and check out new branches. But if you understood that previous sentence, it's unlikely you need this guide.
Forking your project
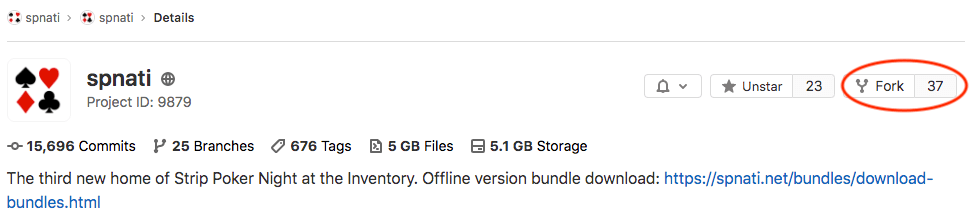
Only SPNatI game moderators have the necessary permissions to directly add new files to the main SPNatI repository, and thus the game. For everyone else, you'll need to Fork the project and submit a Merge Request.
In order to create your own fork, you'll need a Gitgud account. Navigate to https://gitgud.io/spnati/spnati and hit the "Fork" button to make a copy of the SPNatI repo under your account.
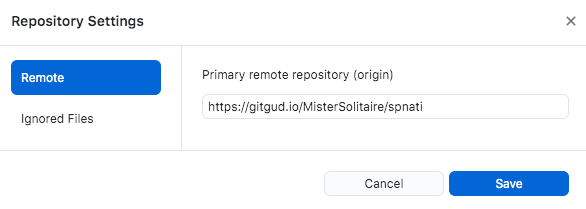
If you haven't yet set up Github Desktop, follow the Reddit guide above, but substitute the original SPNatI repo with the fork you just made. If you've already set up Github Desktop and downloaded a clone of the original repository onto your local hard drive, then you'll need to change where the program is pulling from and pushing to.
Go to Repository > Repository Settings in the menu bar. in the Remote tab, under "Primary remote repository (origin)" put the address of your fork.
Note
In order to push and pull from Github Desktop to your fork, you'll need to set up a Gitgud password, which is separate from the Sapphire password you use to log in to Gitgud.
You can set up a Gitgud password by going to "Settings" (under the top-right account button) and selecting "Password" in the left-hand menu.
Keeping your fork up to date.
Gitgud by itself does not automatically sync your fork with the main SPNatI repository. Fortunately, you can set up autosync anyway thanks to the SPNATI Utilities bot!
Simply DM the bot on Discord b!sync enable [your gitgud username]. This will give you an access token, along with instructions on how to use it:
To allow the bot to synchronize your fork with the official repository, add a new Deploy Key to your fork (at [Your fork settings link]) with the following settings:
Title:
Repository MirroringWrite Access Allowed (Very important!)
Key:
ssh-rsa [KEY HERE]
Follow the instructions given to you by the bot. From there on, your fork's master branch will automatically be kept in-sync with the official repository's master branch. You should now be able to push and pull from your fork the same as the main repo!
Note
If for whatever reason your fork is out of sync and doesn't appear to be updating, use b!sync update [username] to force synchronization. If that still doesn't work, it's likely a bot-side error. Politely inform the SPNatI game moderators, and they'll fix it as soon as is convenient.
Committing your update and pushing a merge request
To make life easier for yourself, you'll want to make sure your repo is fully up to date before anything else.
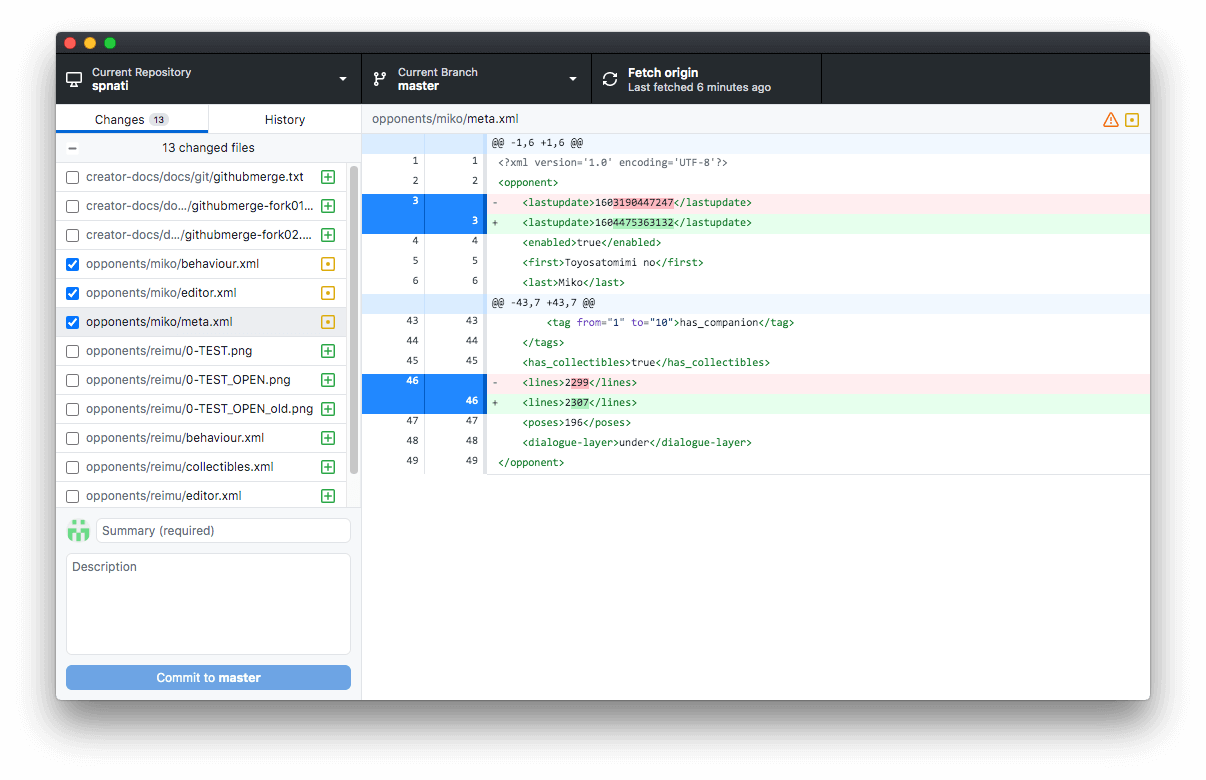
Step 1: In the "changes" tab, select what from the list you want to commit (add to the game) with a check mark. This includes changed files, added files, renamed files, or removed files.
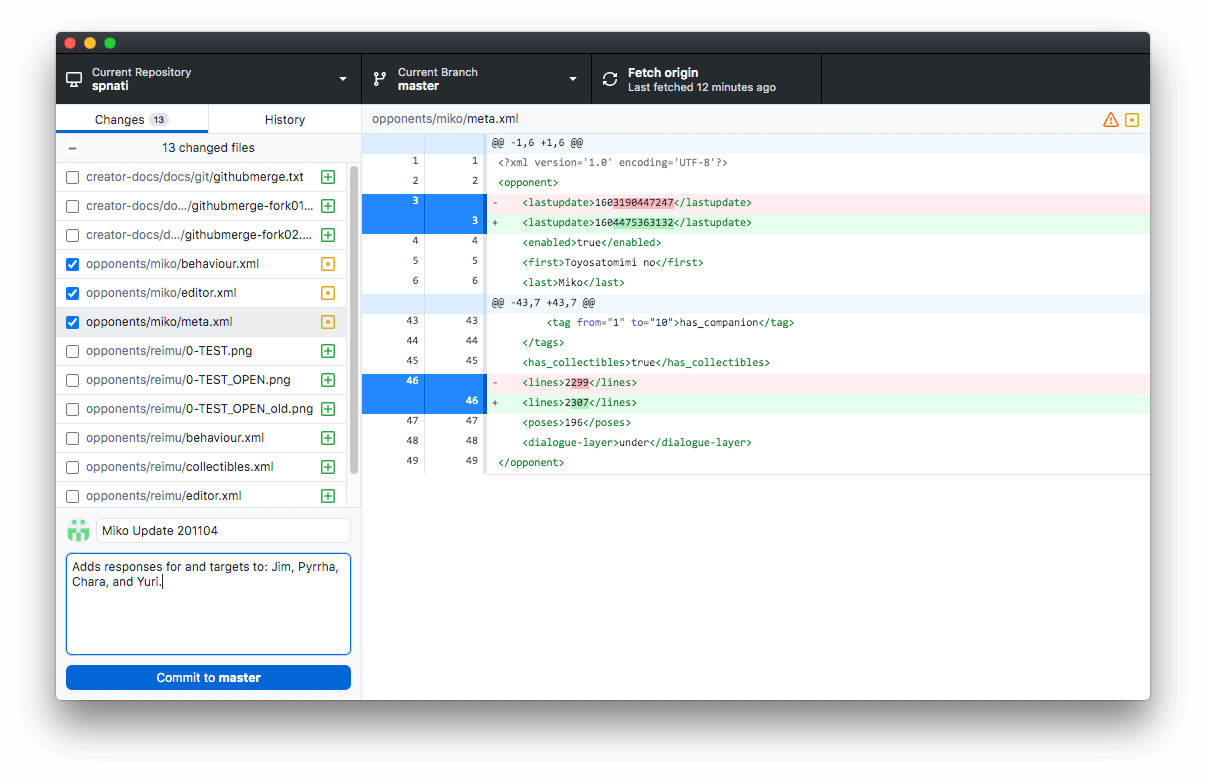
Step 2: Write a commit message that's informative and/or pithy. Then, hit the big "Commit to master" button in the bottom left. This will "lock in" your changes. These changes are what will be sent in your merge request.
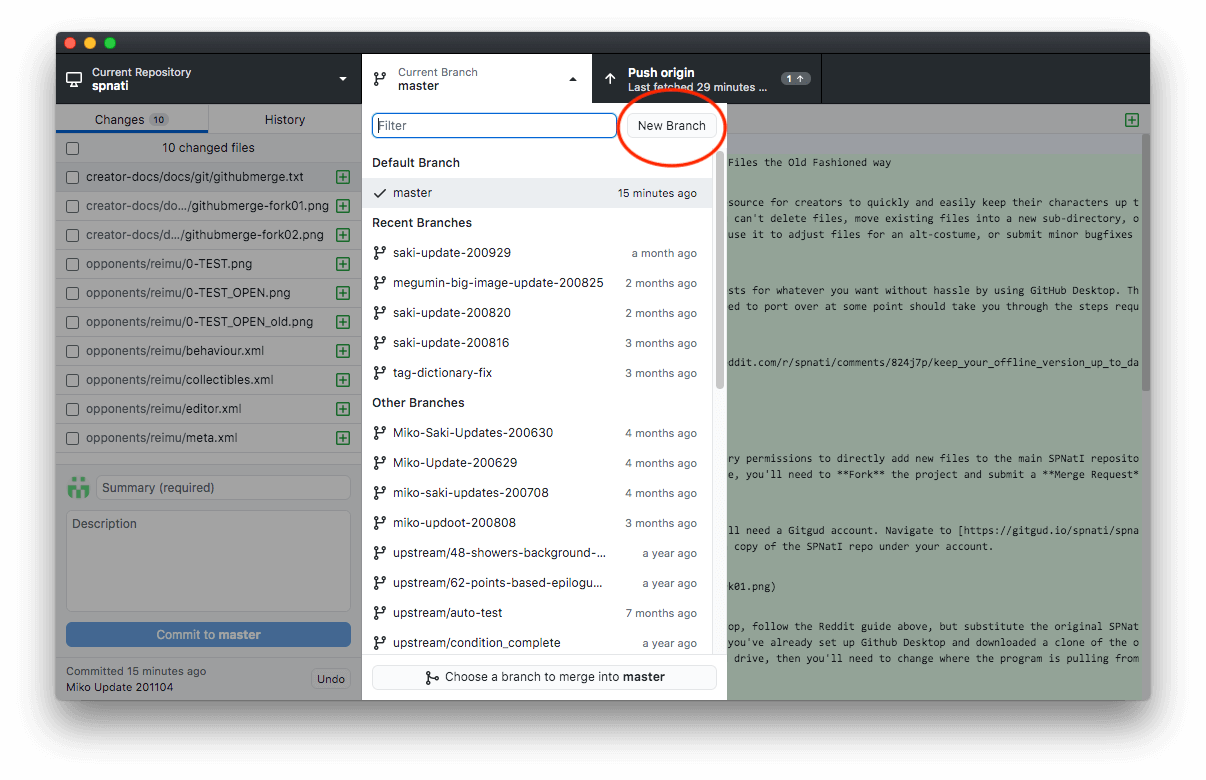
Step 3: Click on the top tab that says "Current Branch: master". Hit the "New Branch" button to make a new branch.
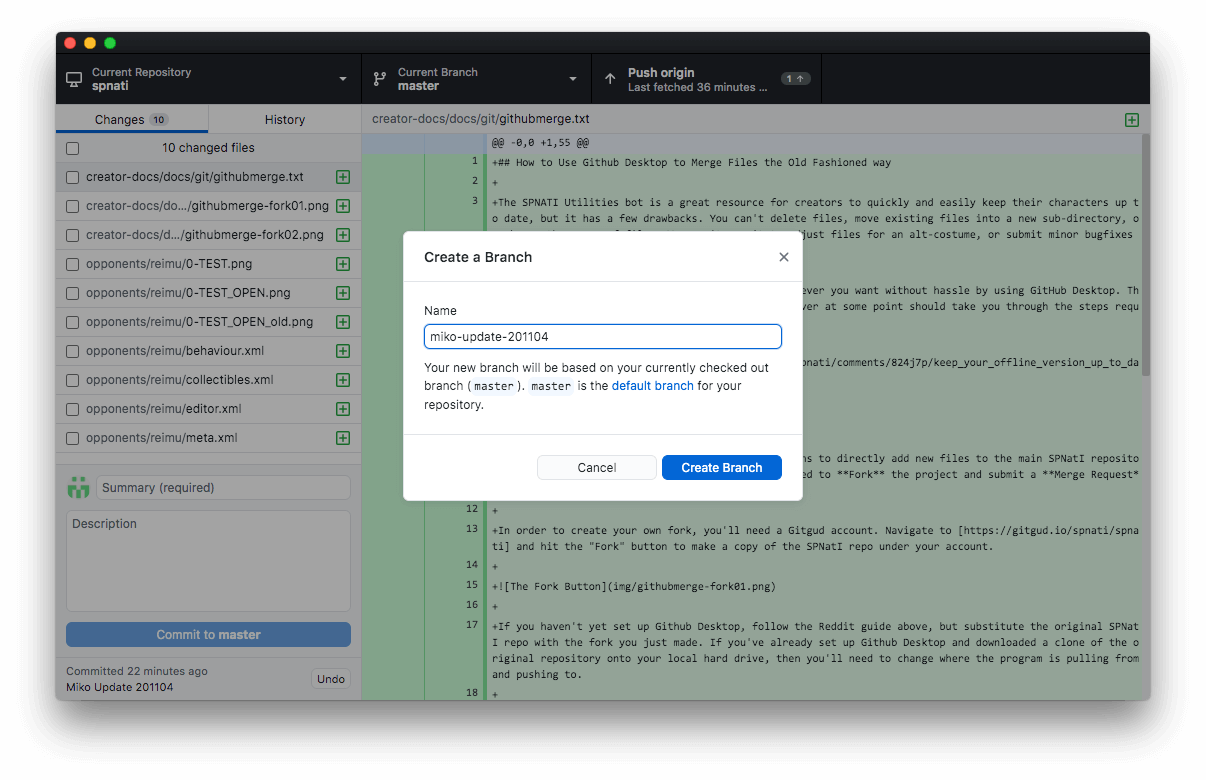
Step 4: Name your branch something simple and obvious. Then click the "Create Branch" button.
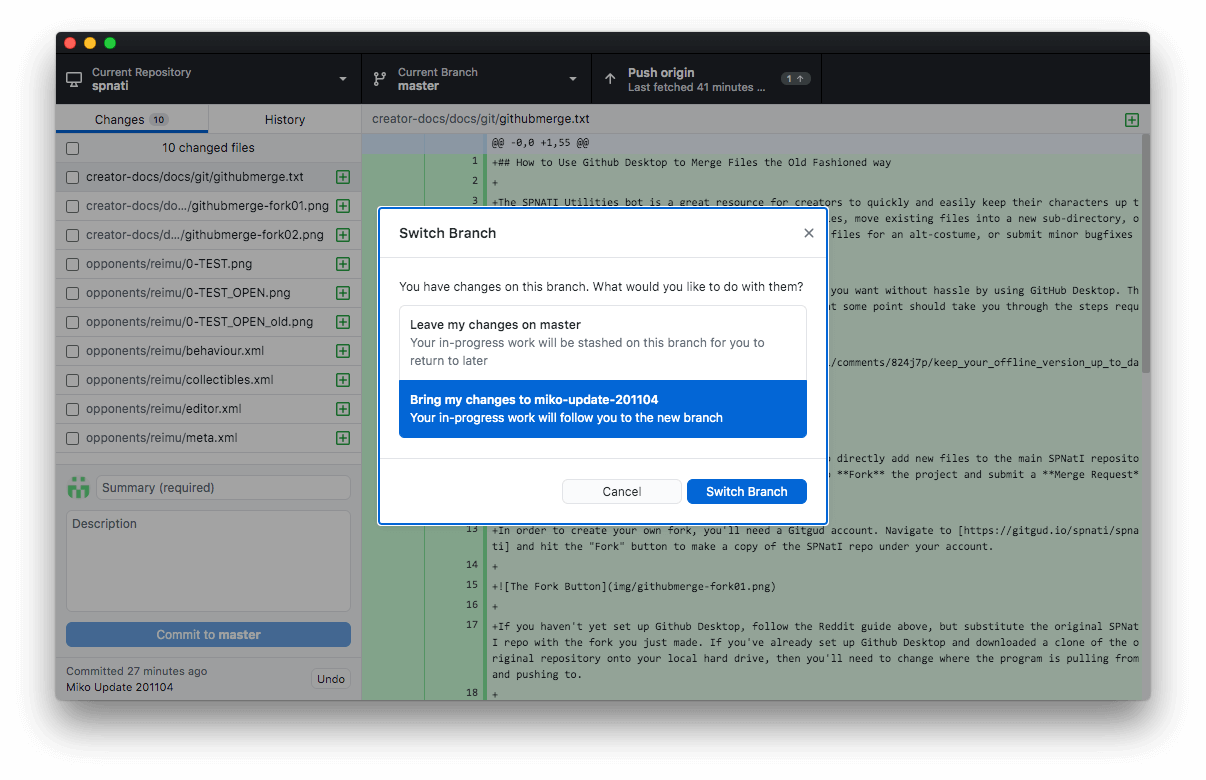
Step 5: When prompted, select "Bring my changes to [new branch]". Otherwise, you won't bring along any of the files you've just committed. This will also bring along any WIP files you haven't committed yet. Once you've made sure the option you want is highlighted, click the "Switch Branch" button.
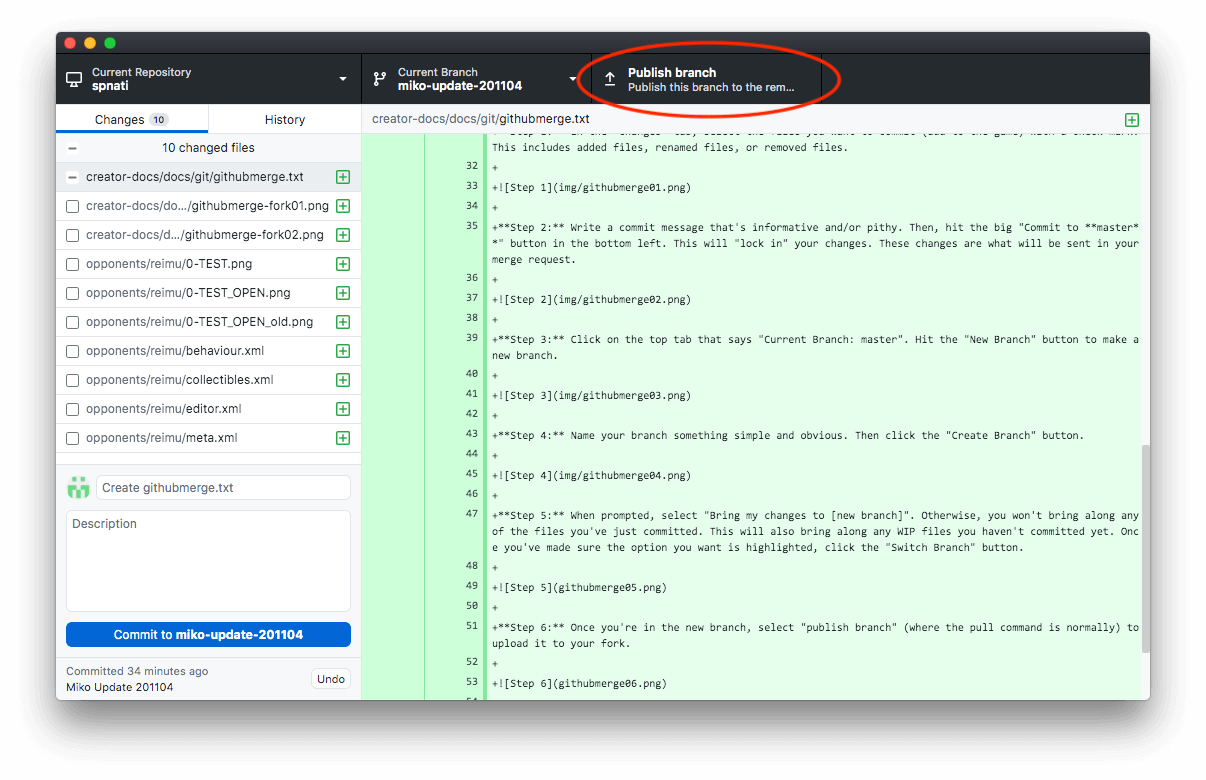
Step 6: When GitHub Desktop is finished switching branches (this may take a minute), select "Publish branch" where the pull command is normally to upload your changes to your fork on Gitgud. When finished uploading, the "Publish branch" button will turn into a "Fetch origin" button.
Step 7: Switch back to the "master" branch using the middle "Current Branch" button. Again you'll be asked if you want to "Bring my changes to master", and again you'll want to select that option before hitting "Switch Branch". Otherwise, it'll make you stash all your uncommitted changes in the branch you're leaving.

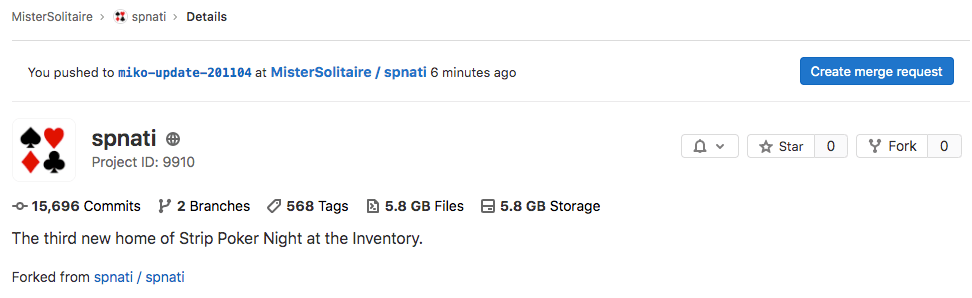
Step 8: Open up your browser and navigate to your fork on GitGud. At the top should be a banner saying "You pushed to [branch] at [fork]/spnati X minutes ago" Next to it is a button, "Create merge request". Hit that button, and it should take you to a Merge Request screen for the main SPNatI repo. Everything should already be filled out, so all you need to submit your merge request is to hit the green button at the bottom.
Step 9: Wait for the mods to merge it!